Manage Advanced Policies
Default Advanced Rate Limiting Tiers
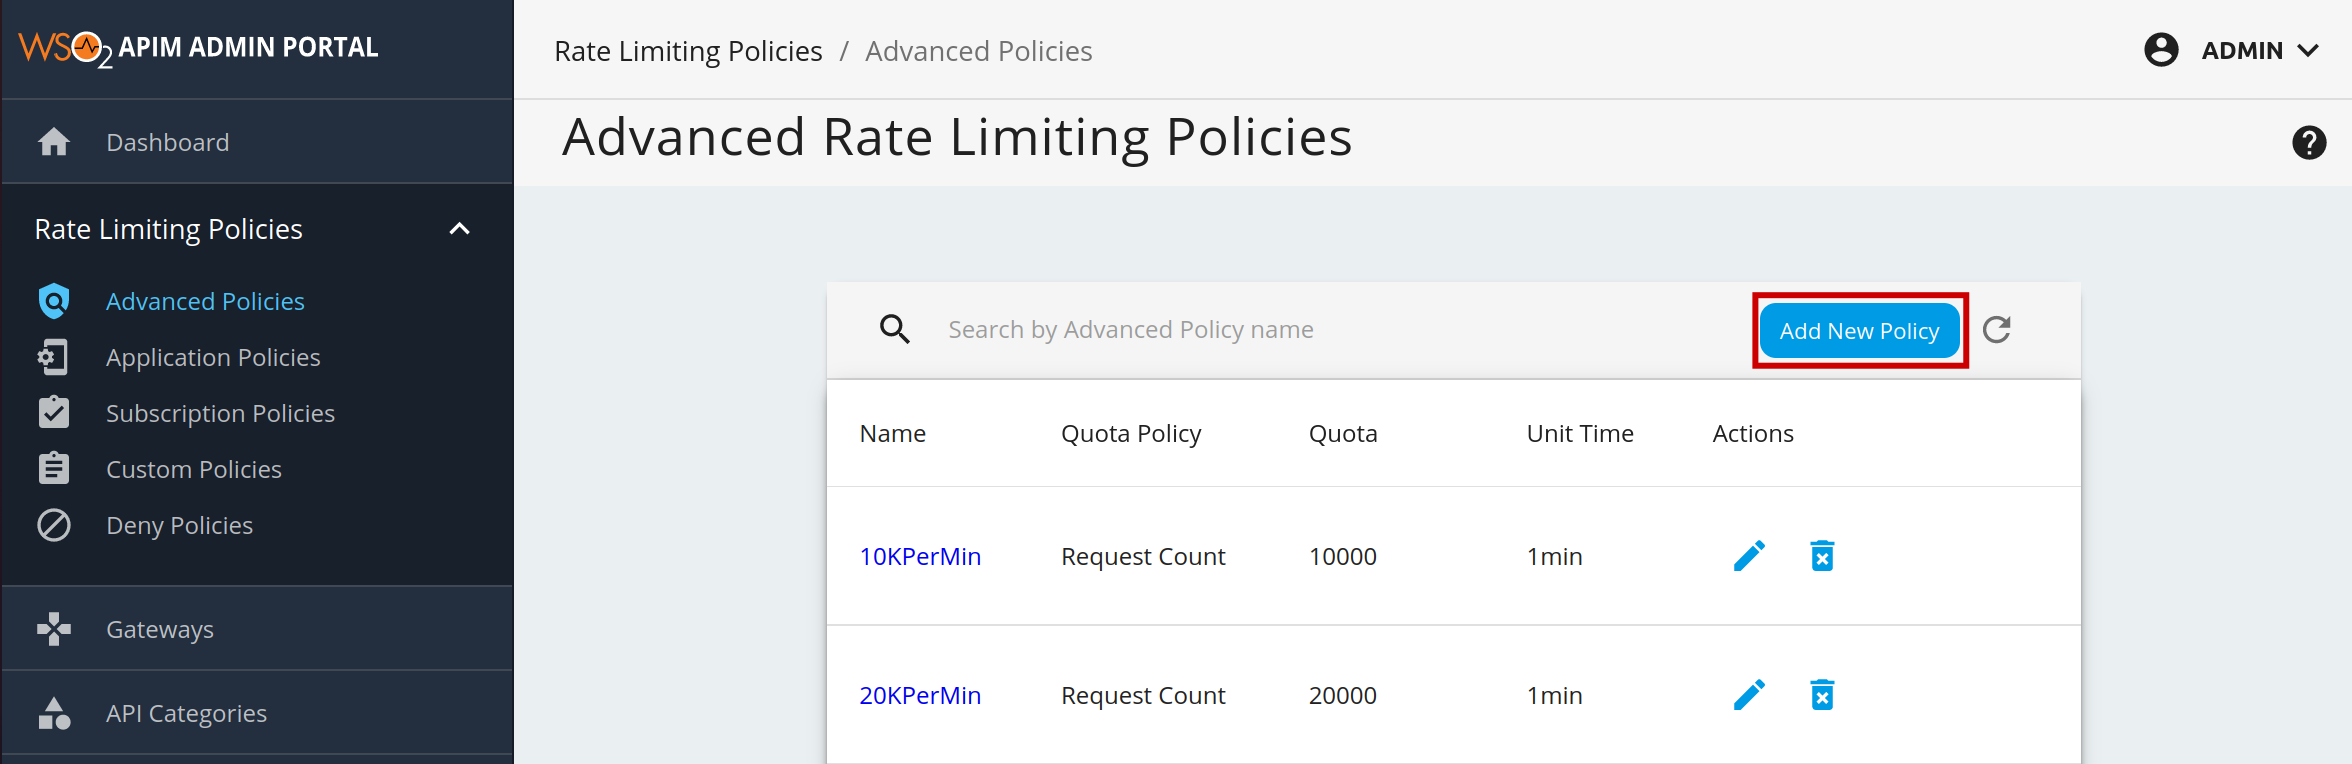
The system includes the following default advanced rate limiting tiers:
- 10KPerMin: 10,000 requests per minute
- 20KPerMin: 20,000 requests per minute
- 50KPerMin: 50,000 requests per minute
- Unlimited: Allows unlimited access
Note
Administrators can disable the Unlimited tier by editing the enable_unlimited_tier element under [apim.throttling] in the <API-M_HOME>/repository/conf/deployment.toml file.
Advanced rate limiting policies can be applied to both APIs and resources.
Adding a New Advanced Rate Limiting Policy
- Sign in to the Admin Portal using the URL
https://localhost:9443/adminand your admin credentials (admin/admin by default). - Click Advanced Throttling under the Rate Limiting Policies section to see the set of existing rate limiting tiers.
-
To add a new tier, click Add New Policy.
-
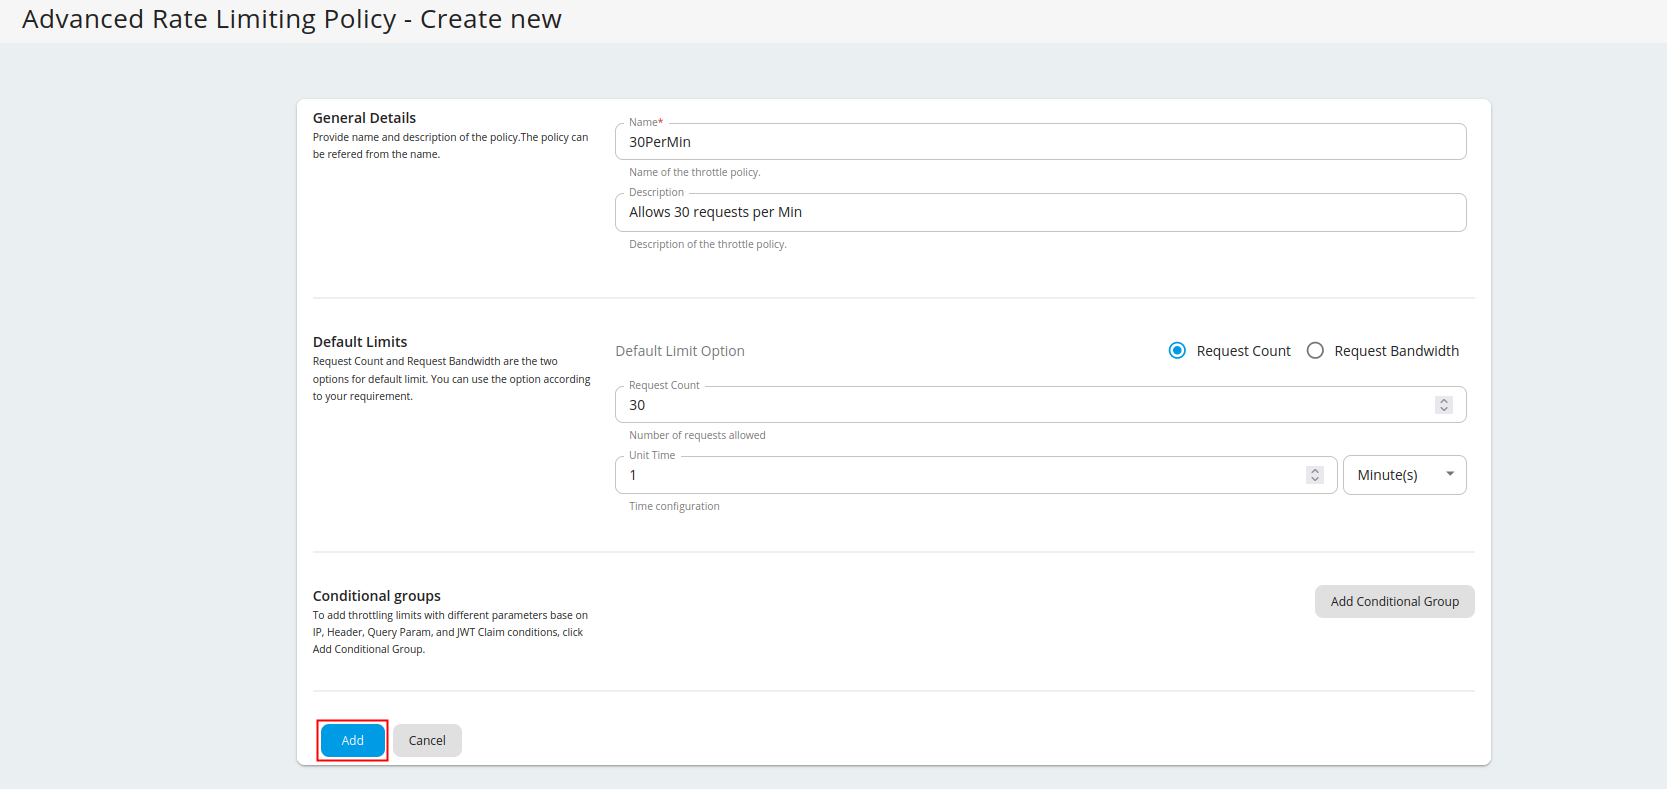
Fill in the required details and click Add.
Note
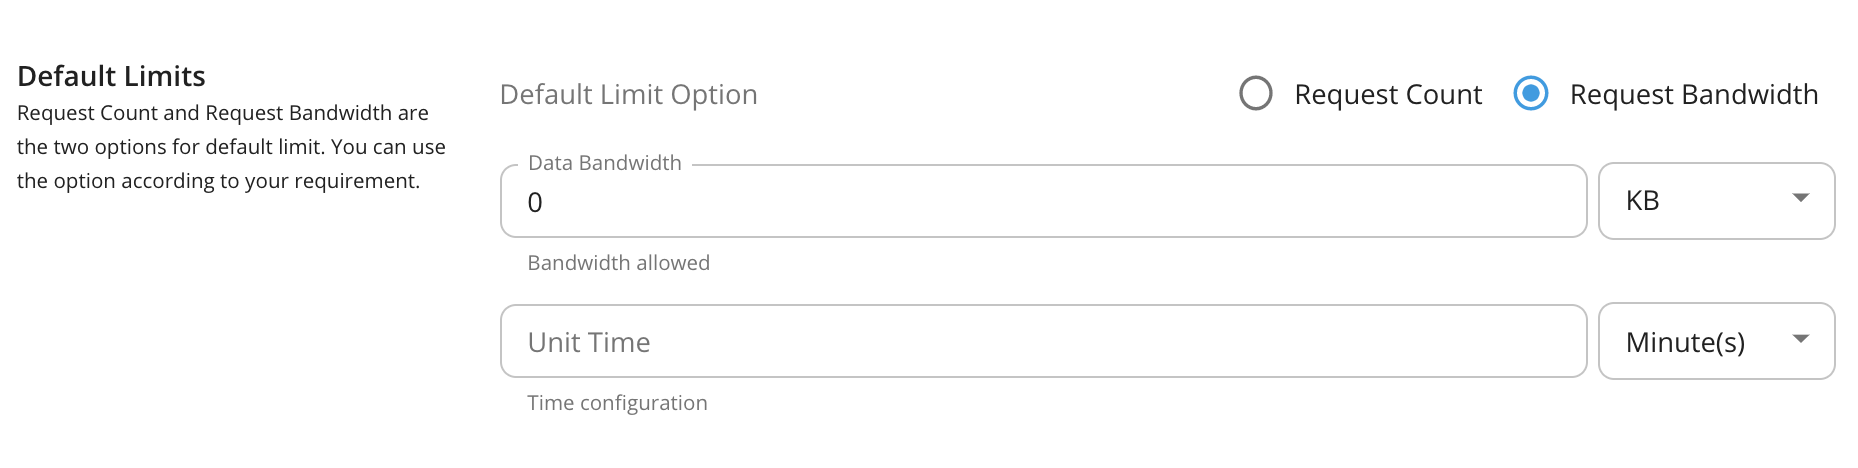
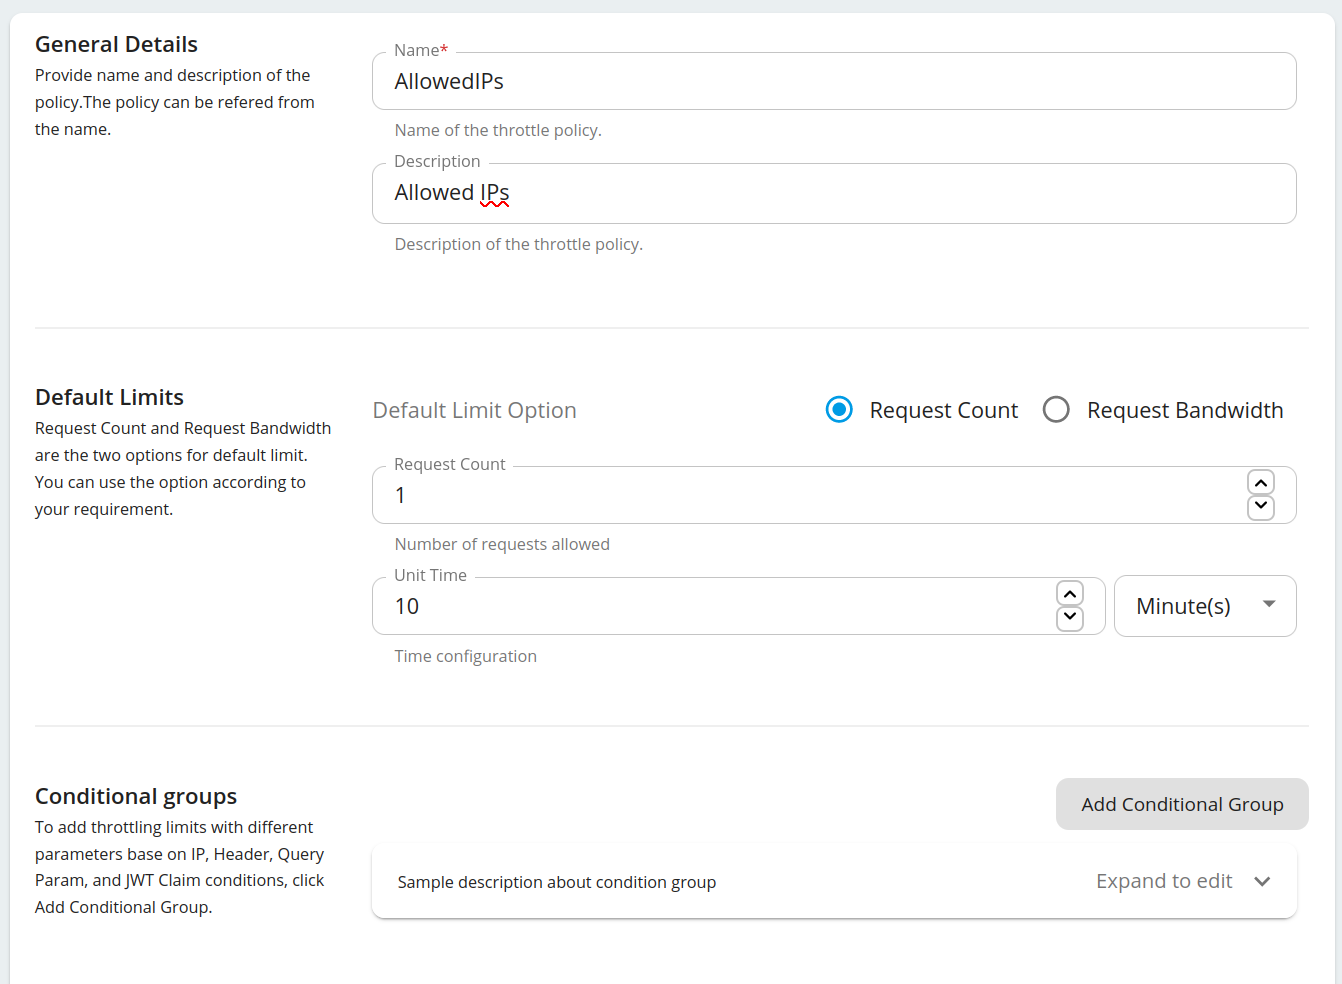
Rate limiting based on request count or bandwidth
Request Count and Request Bandwidth are the two options for default limit. You can use the option according to your requirement. Request Count is commonly used as the limiting option for API requests. If you are using APIs for File sharing and Data transmission you can use Request Bandwidth as your default limiting option.
You have added a new advanced rate limiting policy. You can now apply it to an API or a resource.
Adding Conditional Groups
You can add rate limiting limits with different parameters to the conditions by adding conditional groups.
-
To add conditional groups, click Add Conditional Group.
Note
Enabling header, query param or JWT based rate limiting
- IP based throttling is enabled by default.
-
Note that if you want to add a header, query param, or JSON Web Token (JWT) claim condition, you need to set the
enable_header_based_throttling,enable_jwt_claim_based_throttlingorenable_query_param_based_throttlingelement totrue(depending on which condition you need) under[apim.throttling]in therepository/conf/deployment.tomlfile. - This JWT is the backend JWT and not the one you use to invoke it. In addition, you need to enable the Backend JWT token to get this rate limiting flow to work.
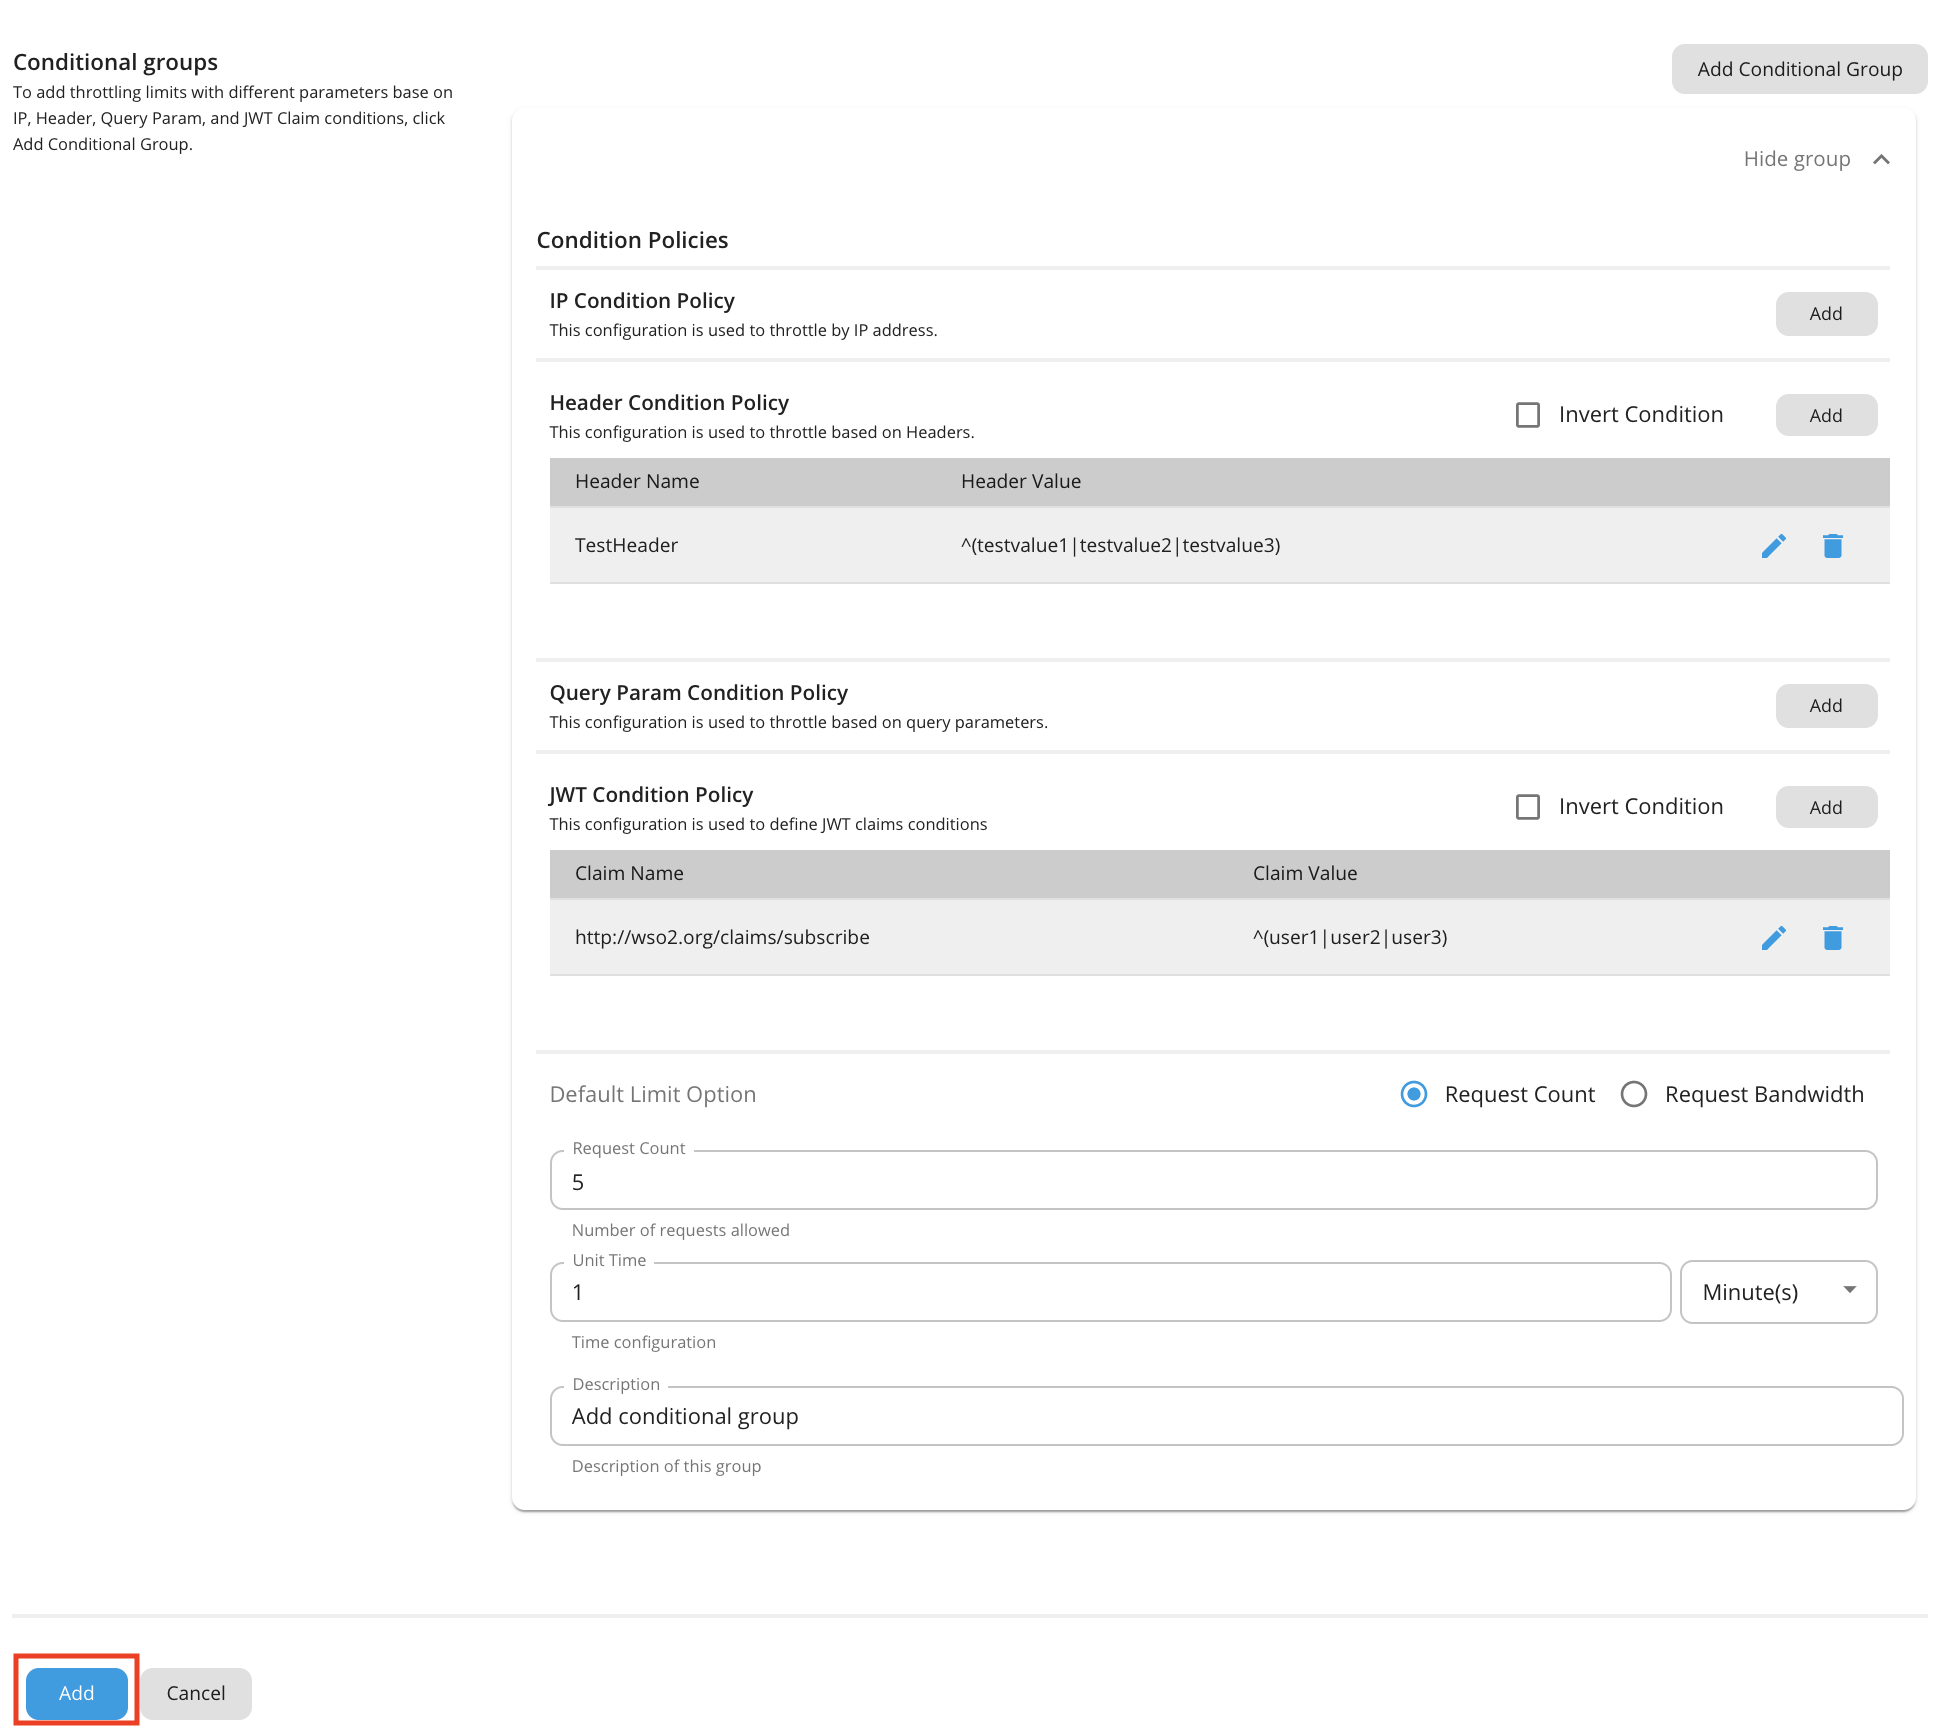
[apim.throttling] enable_header_based_throttling = true enable_jwt_claim_based_throttling = true enable_query_param_based_throttling = trueYou can add a description about the condition group by clicking Description under Condition Group.
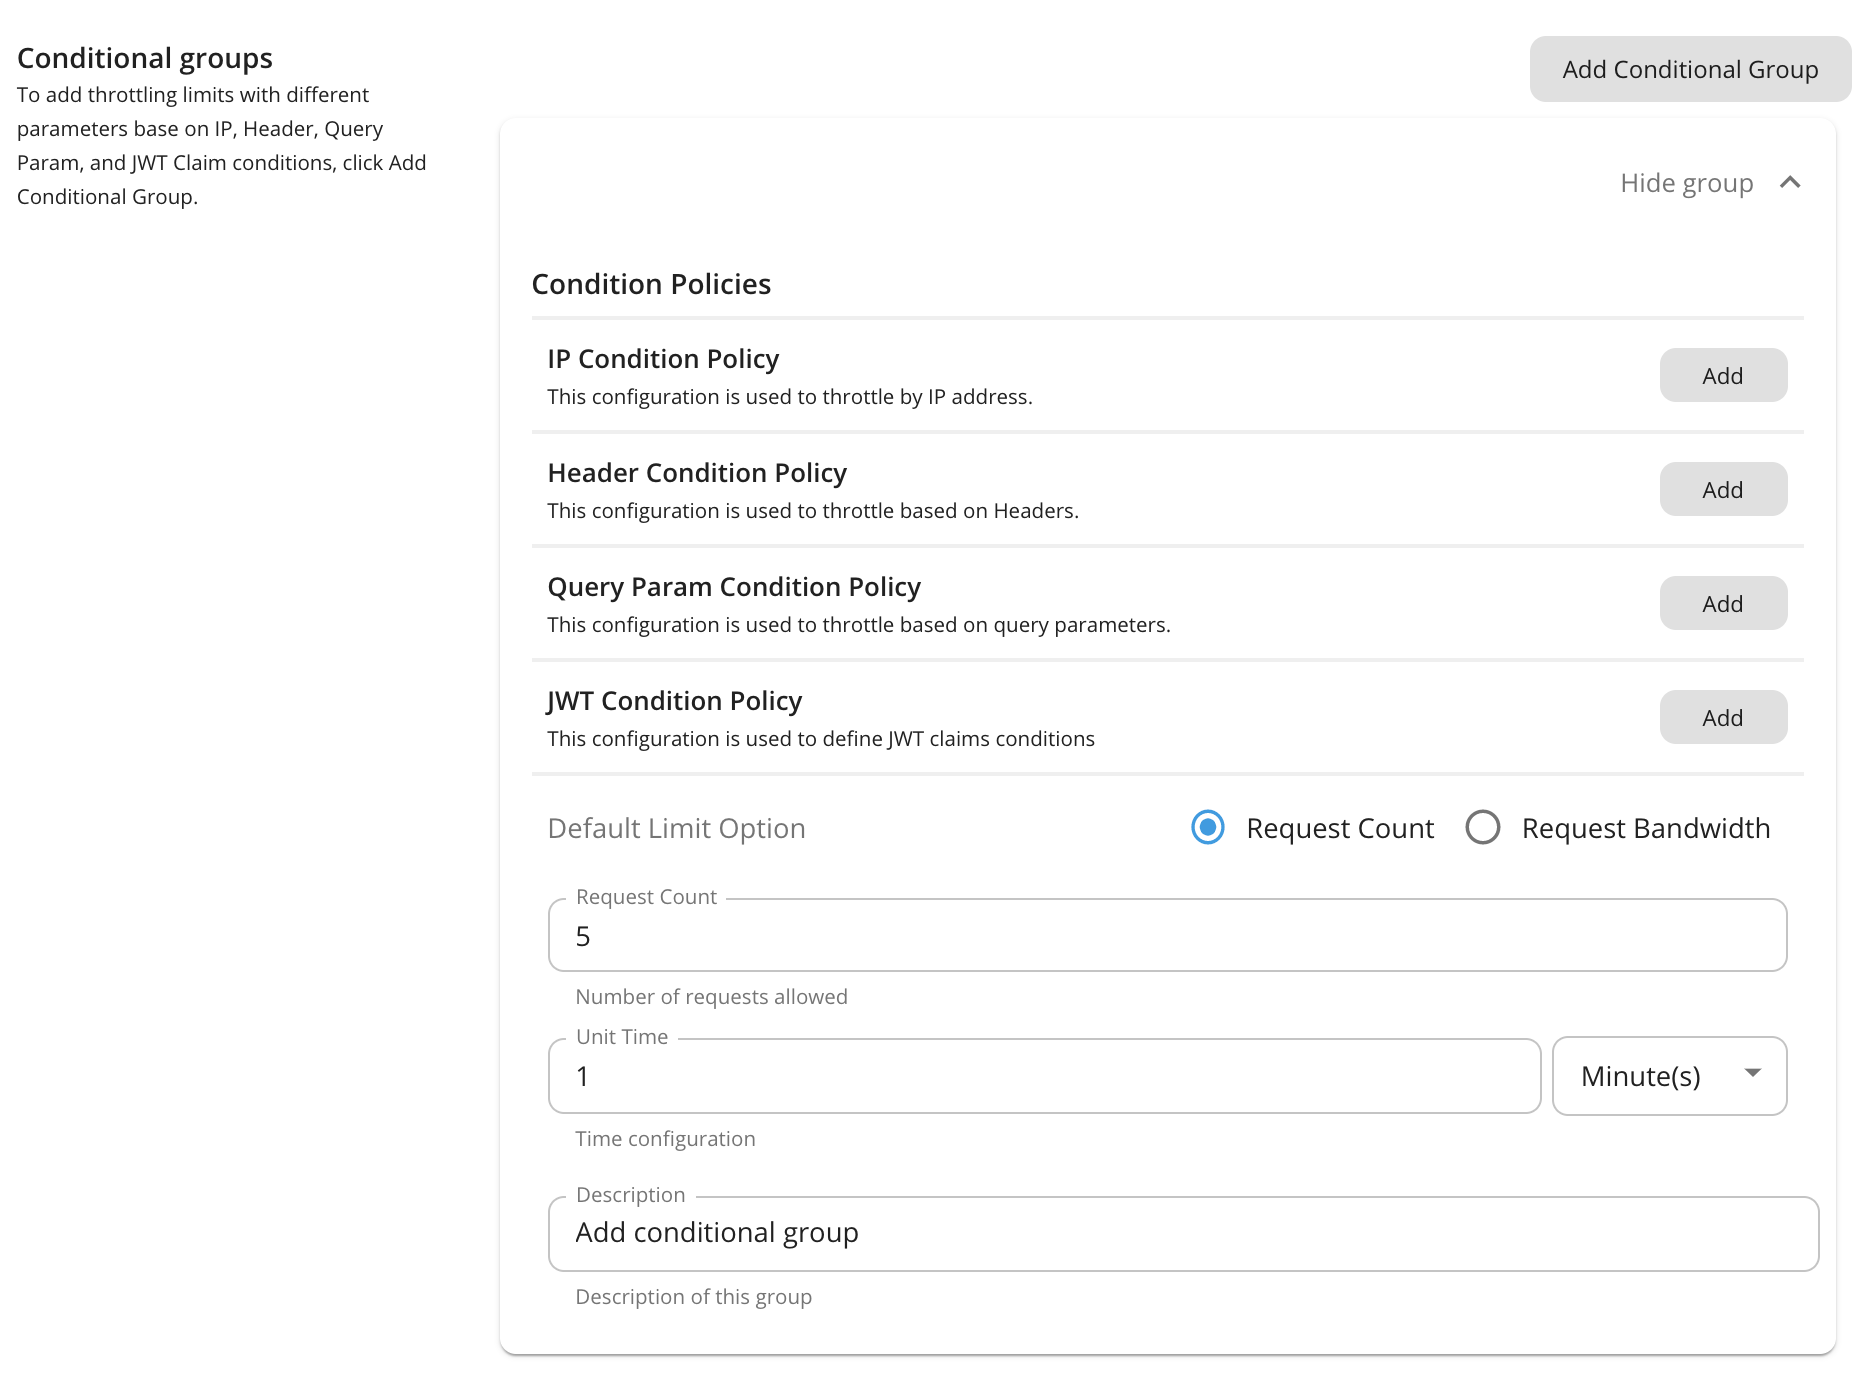
Condition Description value IP Condition Allows you to set a rate limiting limit for a specific IP address or a range of IP addresses. Header Condition Allows you to set a rate limiting limit to specific headers and parameters. Query Param Condition Allows you to set a rate limiting limit to specific query parameters. JWT Claim Condition Allows you to set a rate limiting limit to specific claims. Note
Conditional group evaluation
The conditional group execution policy is used only for that condition. For example, if you add an IP condition and set the request count as shown in the above diagram, only 5 requests will be allowed per minute using that IP condition. The default limit will be applied for any request that evaluates to false with that condition (Outside that condition).
-
Enter a condition and value.
Note
The IP-based advanced rate limiting expects the client IP in the X-Forwarded-For header, in order to detect the IP address and throttle out the request as specified in the IP condition configuration.
-
Header condition and JWT claim condition values allow regex patterns to be defined. You can configure it to make either an exact match or a pattern match for the value using the regex values. For example:
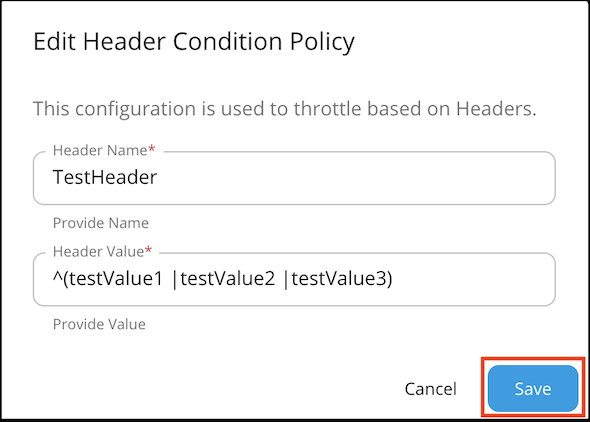
Note
JWT condition
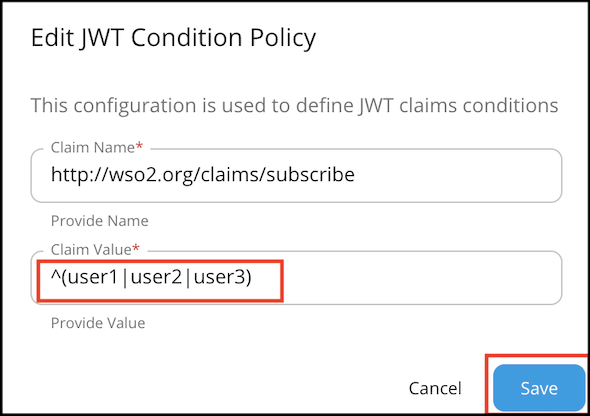
Claim name : Name of the JWT Claim Example:
- "iss" - The issuer of the JWT
- " http://wso2.org/claims/apicontext " - Context of the API
- " http://wso2.org/claims/version " - API version
Claim value : Value to be checked in the corresponding claim. (allows regex patterns as well)
Invert condition : Whether to take the throttle decision based on the equality of the values. Example: If the claim name is "iss" value is "wso2" and "invert condition" is off - Requests having "wso2" as "iss" claim will be throttled. If the claim name is "iss" value is "wso2" and "invert condition" is on - Requests not having "wso2" as "iss" claim will be throttled.
Note
This JWT claim is the backend JWT and not the one you use to invoke it. Also, you need to enable the Backend JWT token to get this rate limiting flow to work.
-
Once done, click Add.

Note
Adding multiple conditional groups
You can configure multiple conditional groups when defining a tier for advanced rate limiting policies. For example, it is possible to apply both an IP based rate limiting and a query parameter condition in a single advanced policy.
Manage API Access Control by Defining Allowed IPs
When requests to an API should be permitted from only a set of known/trusted IPs, you can achieve this by configuring a group of Allowed IPs through the Advanced Rate Limiting feature.
Creating the Advanced Rate Limit Policy for Allowed IPs
- Login to the Admin Portal of WSO2 API Manager (https://<ip_address>:9443/admin).
- Under the Rate Limiting Policies tab, navigate to Advanced Policies.
-
Click Add New Policy to add a new Rate Limit tier.
-
Fill the details and click Add Conditional Group.
-
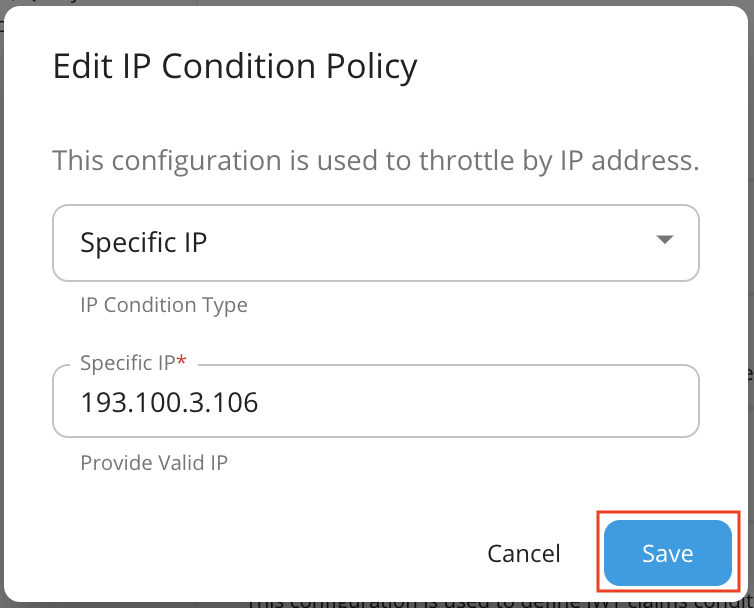
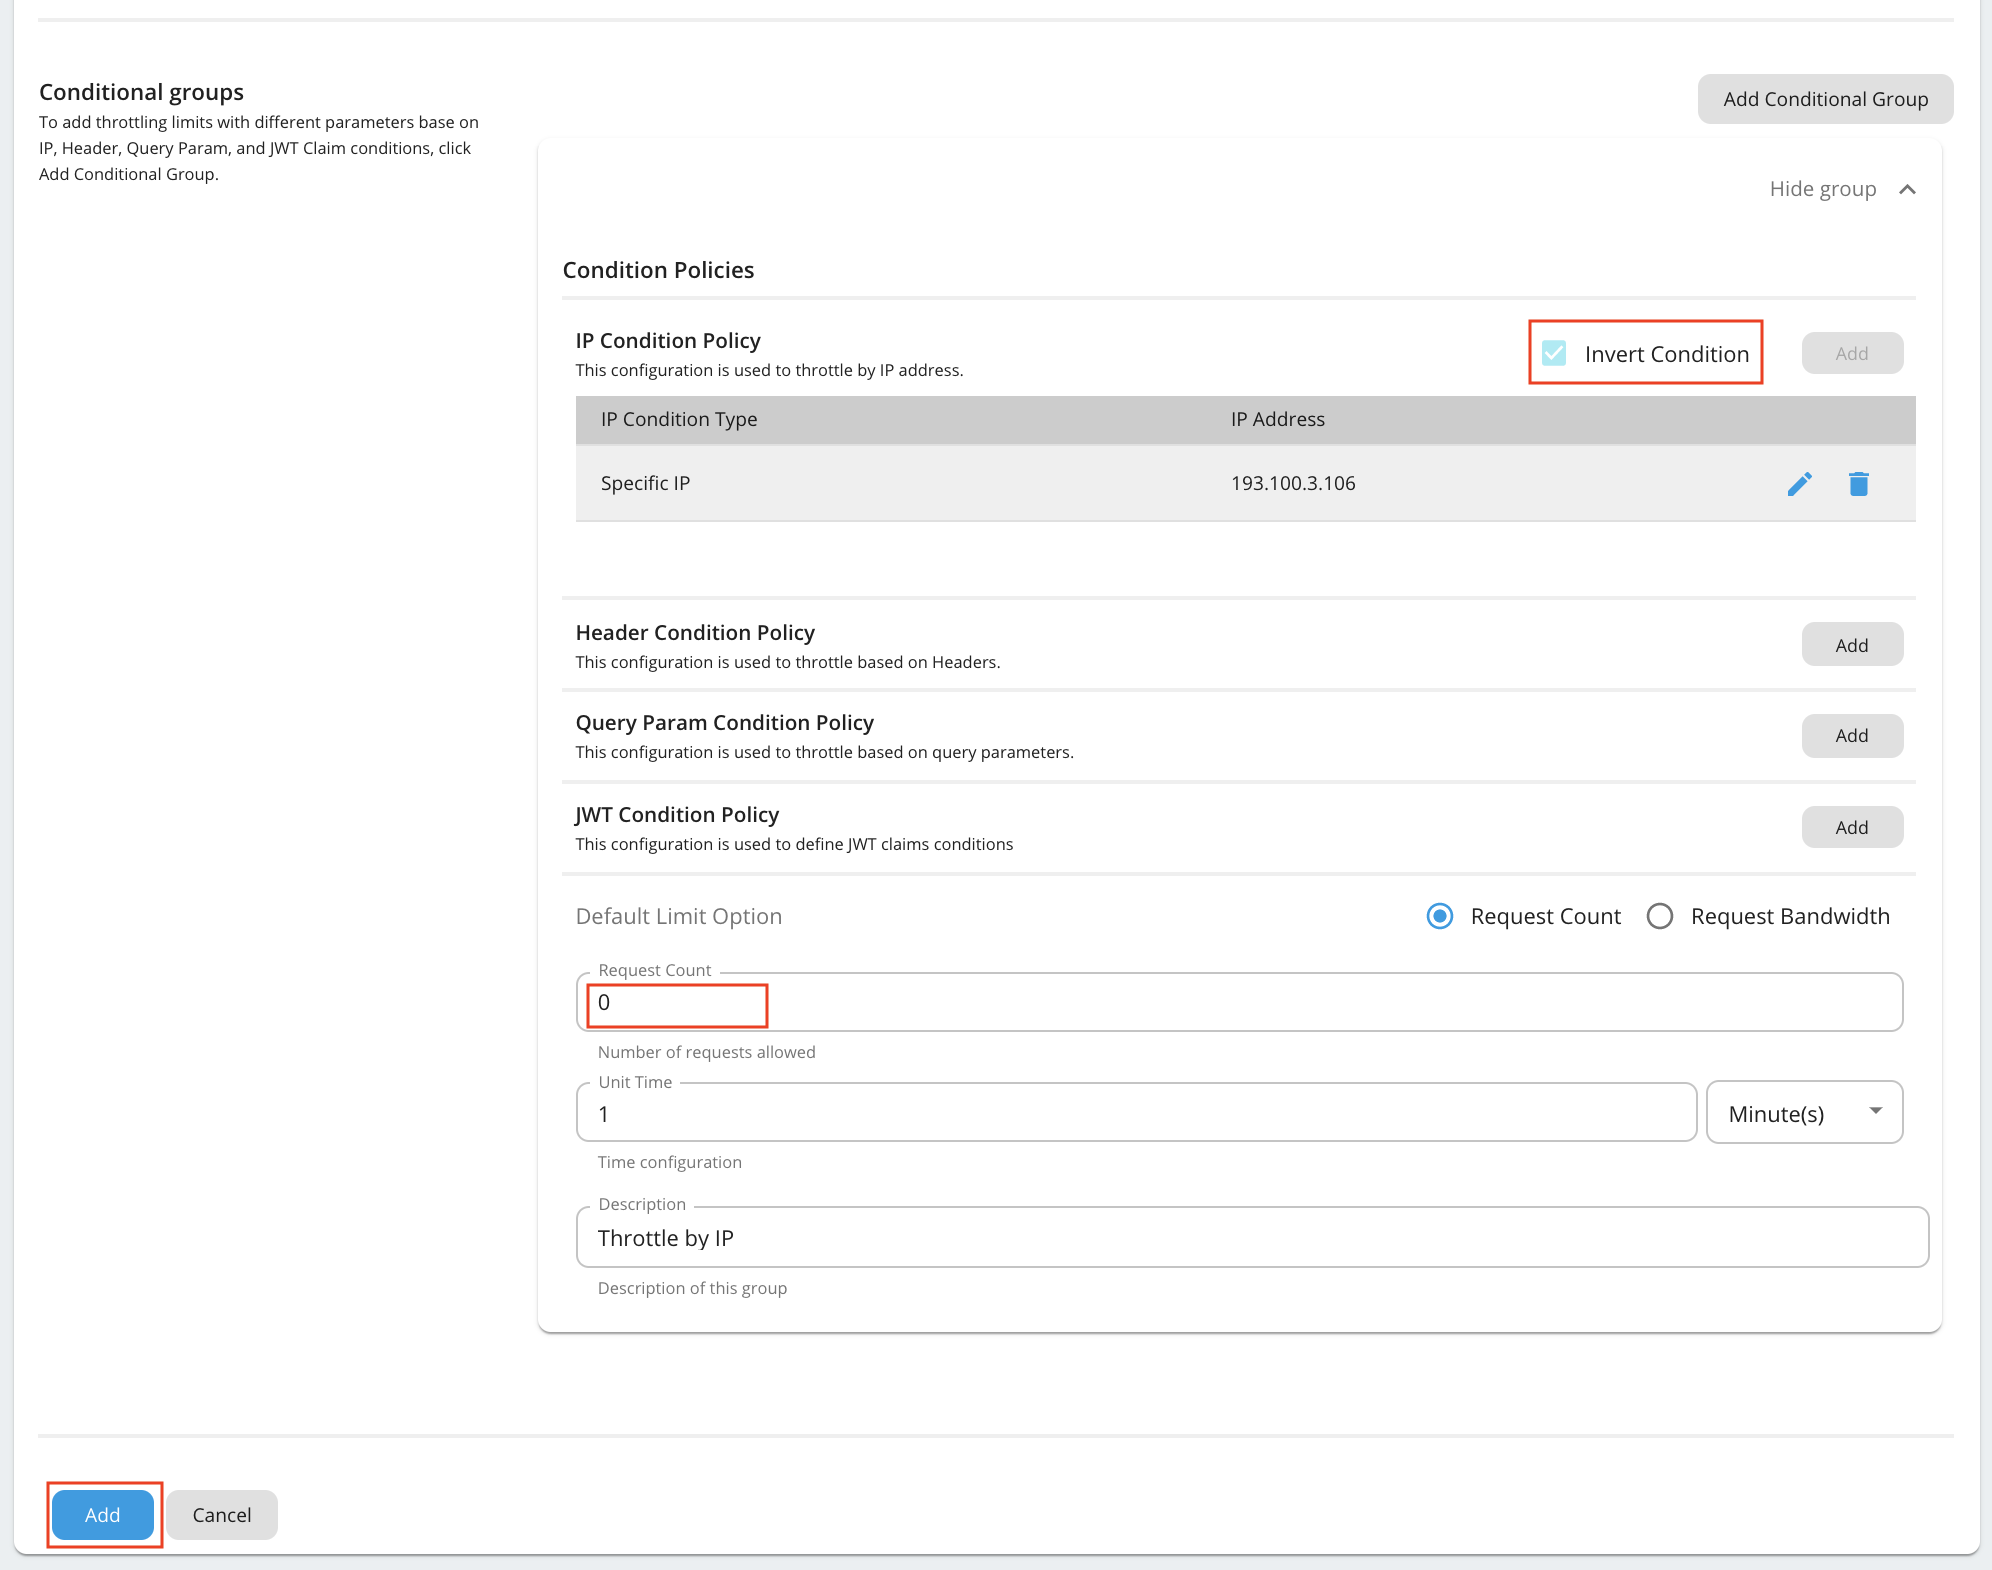
Open the Conditional Group added and fill the details.
Property Value IP Condition Type Specific IP IP Address E.g. 193.100.3.106 Invert Condition Checked (If the 'Invert Condition' is checked, then the condition applies only to the IPs not mentioned in the 'IP Address'.) Request Count 0 Following is an example configuration.
Note
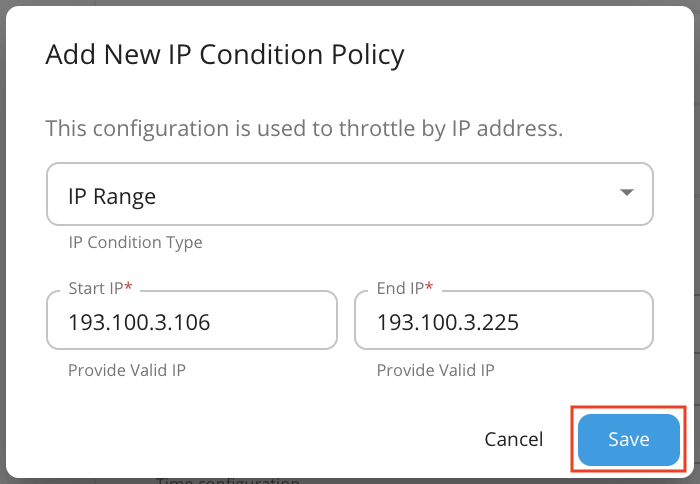
In the above configuration we are allowing a Specific IP address to access an API. You can allow a range of IPs as well by selecting IP Range for the IP Condition Type in the Conditional Group and specifying the range as follows.
-
Click Save.
You have now successfully created the policy.
Note
The policy will be re-enforced for every unit time. Each time the policy is enforced a minimum of 1 request will be allowed to pass before blocking requests. Having a smaller unit time will increase the frequency of requests passing through. Hence, having a larger unit time is suitable to minimize the number of requests passing through.