Updating Tools and Deploying the MCP Server
After creating a MCP Server from an existing API, you may need to refine the generated tools, verify their behavior, and deploy them to the right environment. This ensures they are intuitive for consumers and function as expected before being published.
1. Modifying or Adding Tools
Once your MCP Server is created, the Tools section allows you to adjust existing tools or add new ones.
Navigating to Tools
- In the left navigation menu, go to API Configurations → Tools. This view lists all the tools automatically generated from the API resources.
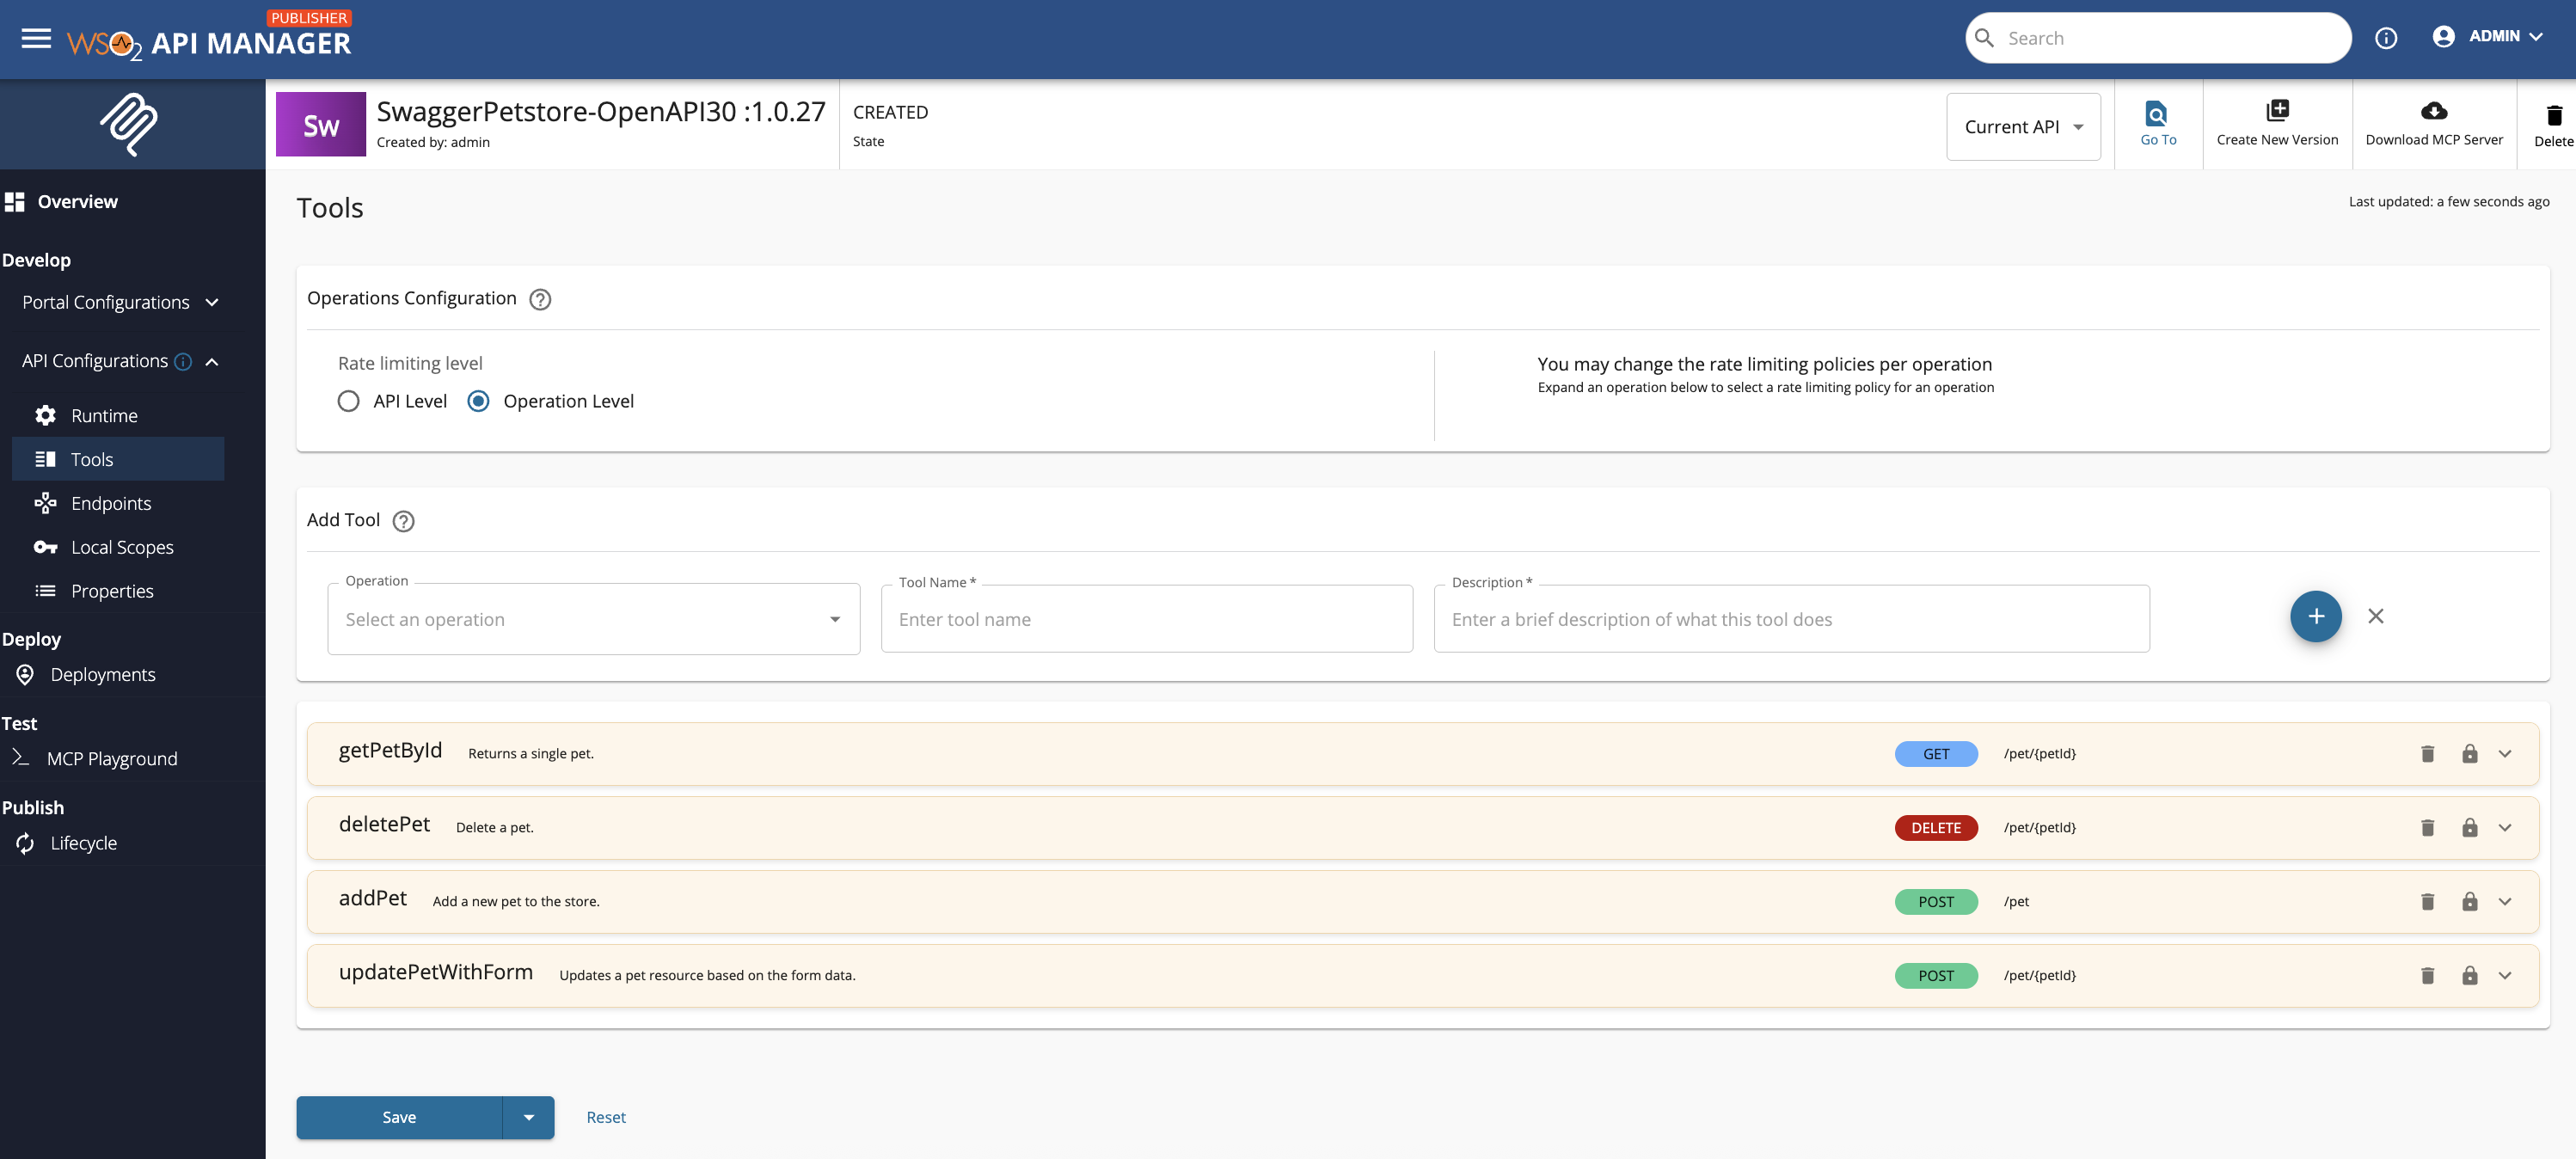
Editing Existing Tools
-
Rename Use short, clear, and descriptive names that reflect the tool’s purpose. This helps consumers quickly identify the right tool when multiple tools are available.
-
Edit the Description Add clear, contextual guidance. Descriptions should:
-
Explain what the tool does.
- Provide hints for correct usage (e.g., “Use this tool to retrieve a list of active orders filtered by date”).
- Mention any important constraints or expected input formats.
Adding New Tools
- Click Add New Tool.
-
Fill in the required fields:
-
Operation – Select the API resource (In MCP Server Proxy scenario this becomes a TOOL) to base the tool on (e.g., a specific GET or POST endpoint).
- Description – Provide enough context for LLMs to understand the tool’s capabilities.
-
Tool Name – Must be unique and ideally follow a consistent naming convention.
-
Save your changes.
Best Practices
- Avoid overly generic tool names like “GetData”.
- Keep descriptions concise but informative.
- Group related tools with consistent prefixes (e.g.,
orders_list,orders_create,orders_cancel).
Note
Renaming tools and improving their descriptions significantly enhances discoverability and usability for client applications and LLMs.
2. Deploying the MCP Server
Before your MCP Server can be tested or used, it must be deployed to a specific Gateway.
Deployment Steps
- In the left menu, go to Deploy → Deployments.
- Choose the Gateway where you want to deploy the MCP Server. Tip: Select the Gateway closest to your intended user base to reduce latency.
- Click Deploy.
- Wait for the deployment confirmation message.

Deployment Tips
- Ensure the Gateway environment (dev, staging, prod) matches your testing plan.
- If you maintain multiple environments, test in a lower environment first.
- Monitor deployment logs for errors or warnings.
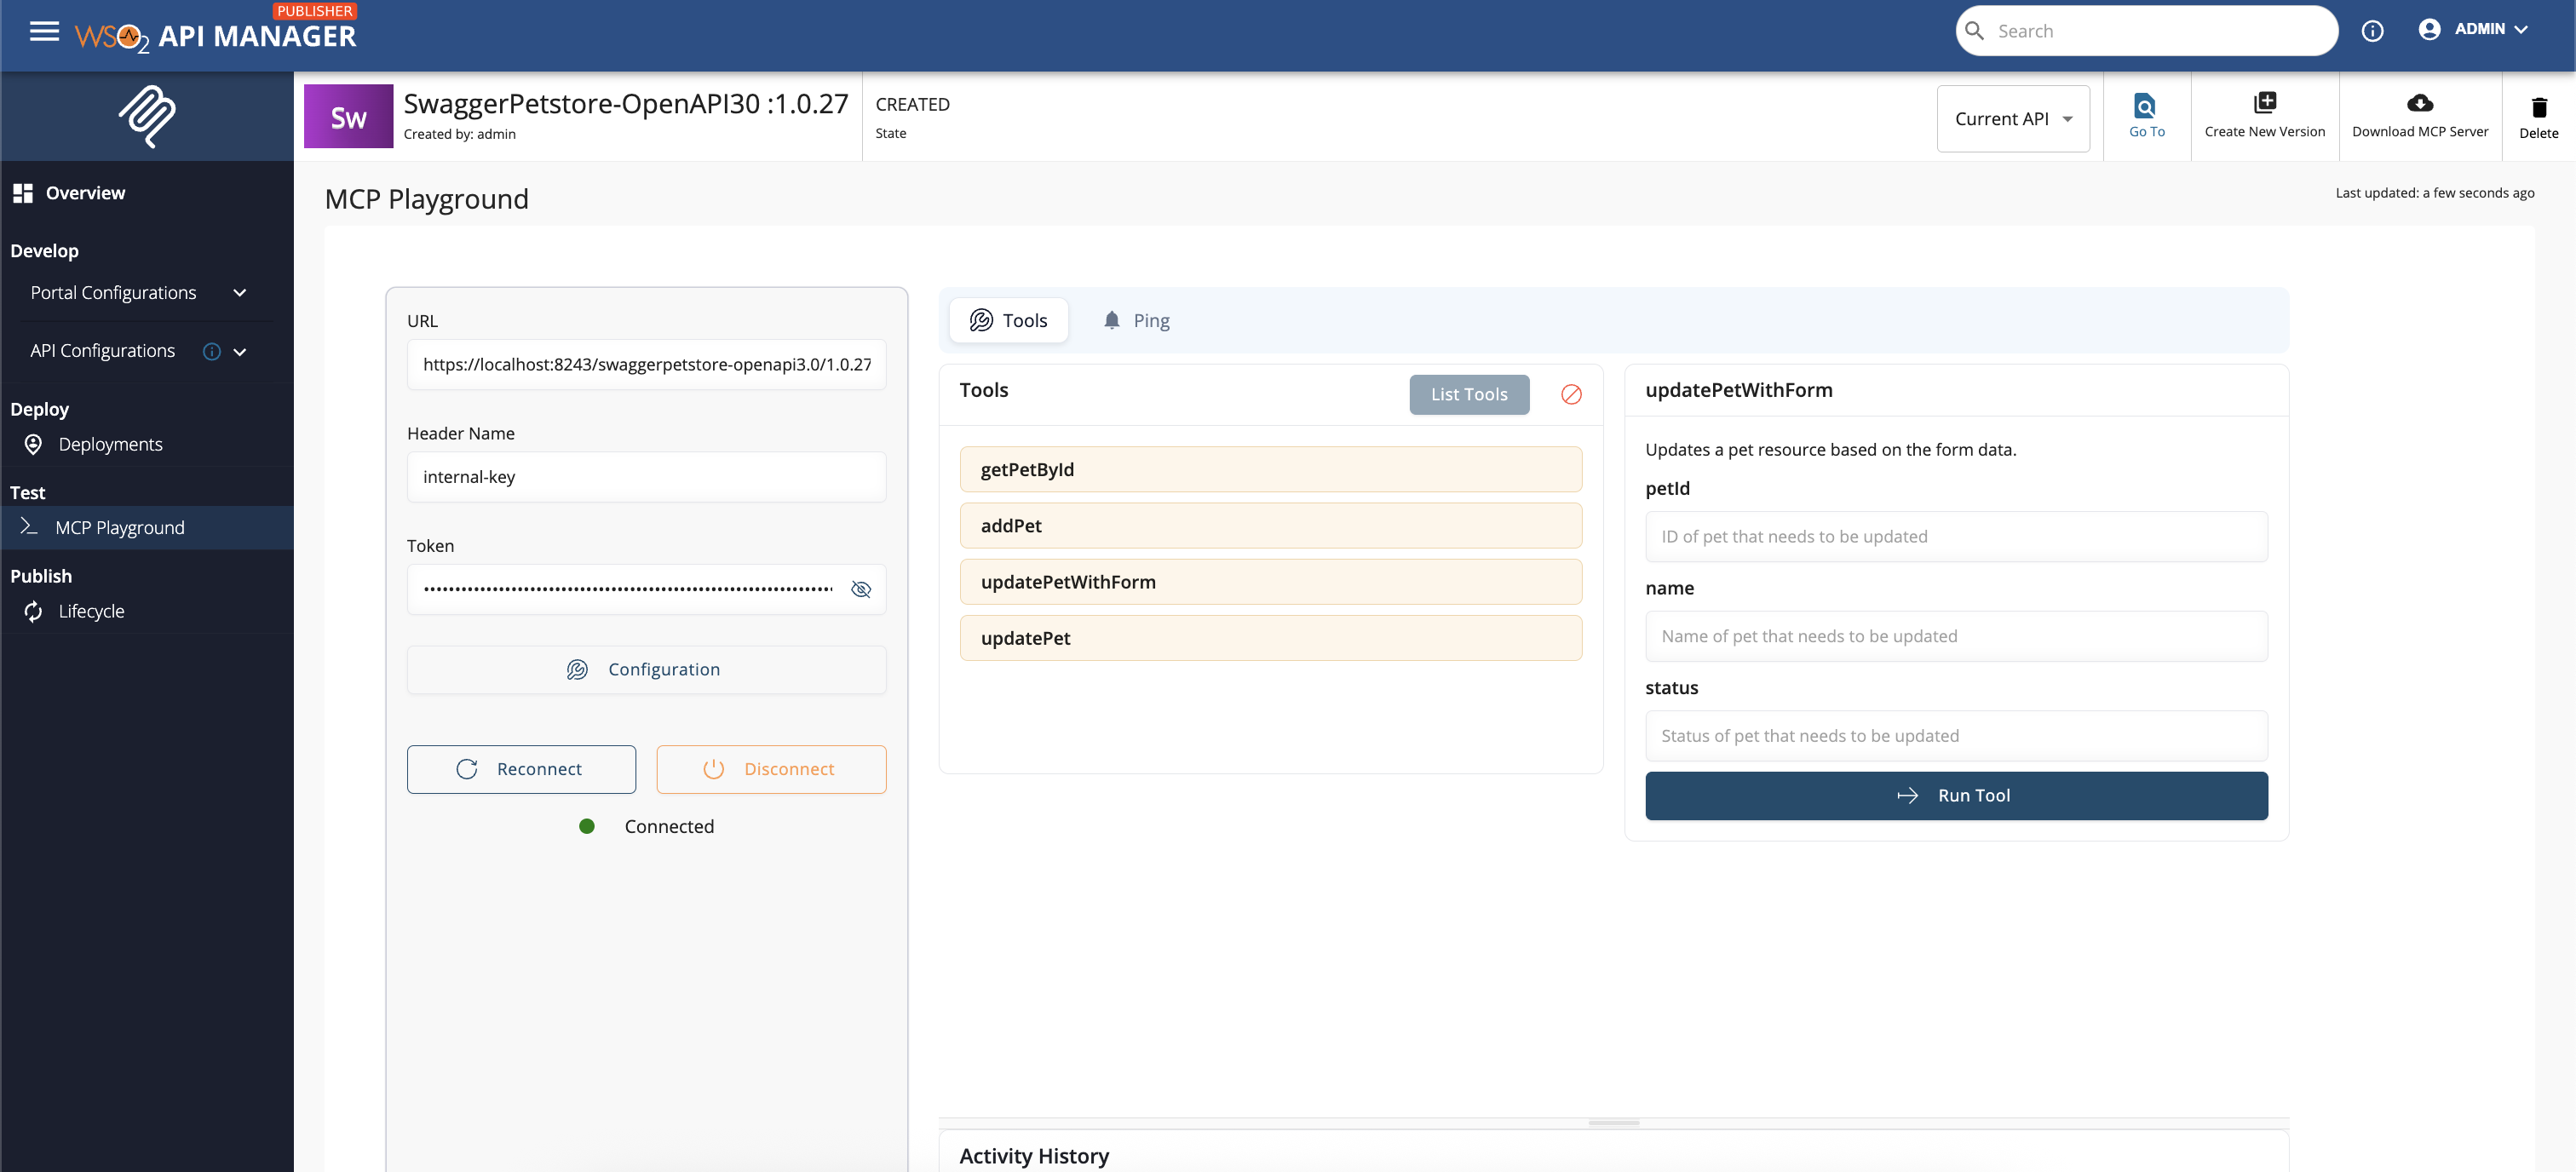
3. Testing with the MCP Playground
The MCP Playground in the Publisher Portal allows you to test tools without publishing them.
Testing Steps
- In the left menu, go to Test → MCP Playground.
- Click Connect to establish a session with the MCP Server.
-
Interact with the available tools:
- Provide example inputs.
- Check if the output matches expectations.
- Validate that descriptions guide the correct usage.
-
Note any issues and update tool configurations as needed.
Why This Matters
Testing here ensures that tools work as expected before they are exposed to external consumers. This step can prevent integration errors and user confusion.
4. Publishing the MCP Server
Once the MCP Server and its tools are tested and verified, you can publish it to make it accessible in the Developer Portal.
Publishing Steps
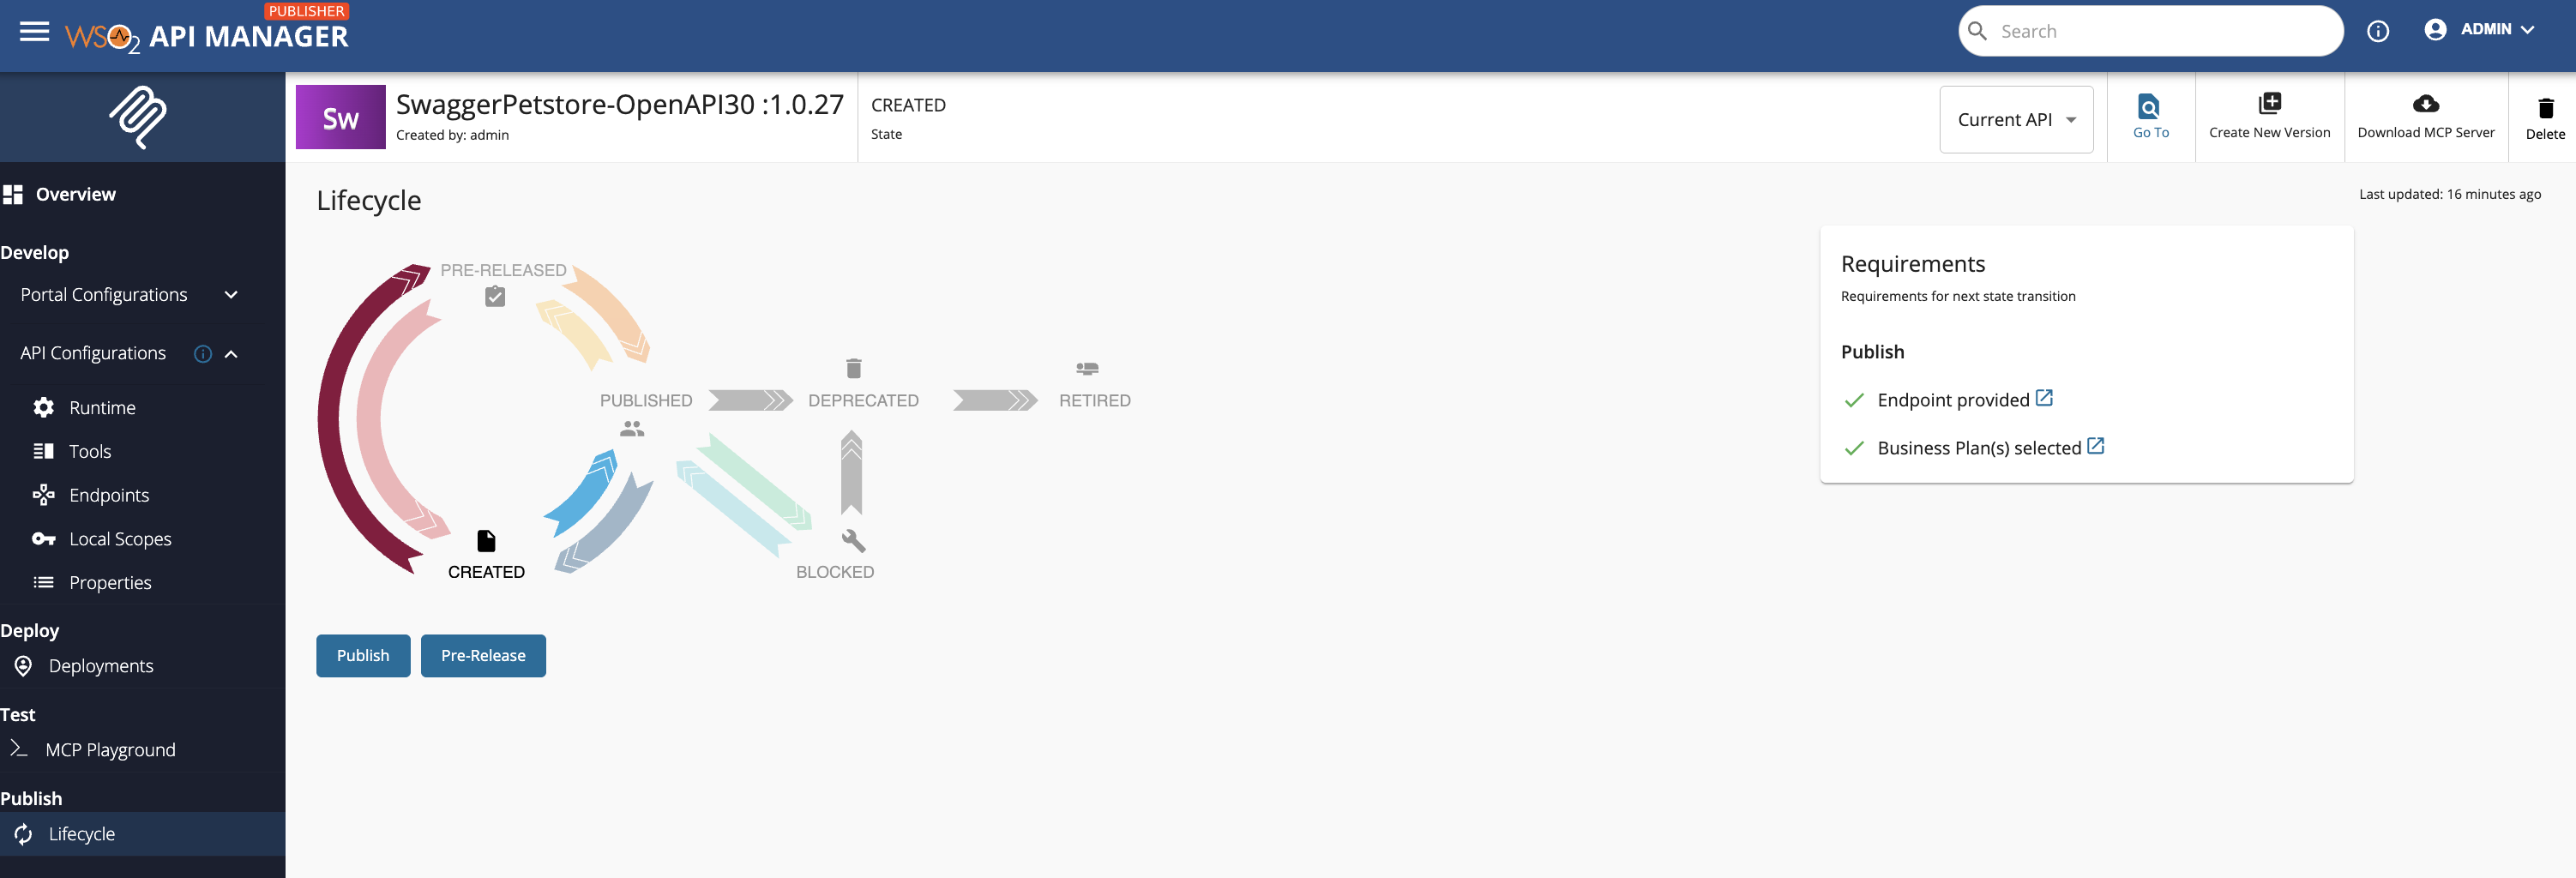
- In the left menu, go to Publish → Lifecycle.
-
Review the MCP Server details to ensure:
-
Tool names and descriptions are finalized.
- All necessary deployments are active.
- Click Publish.
Publishing Considerations
- Published MCP Servers become discoverable by application developers.
- Only publish when you are confident in both functionality and documentation.
- After publishing, consider adding API usage examples in the Developer Portal for better adoption.