B2B API Consumption
Before this release, WSO2 API Manager operated without a defined organizational structure, maintaining a flat hierarchy. This led to limitations, including a lack of control over API visibility, business-specific subscriptions, and business-level insights. With the introduction of B2B features, you can now achieve a more structured approach.
Note
This release only provides support for organization-based restrictions in the Developer Portal.
Set Up an Organization-Supported Identity Server
The WSO2 API Manager B2B Organization feature is compatible with any Identity Server that supports organization hierarchies. To utilize the Identity Server's organization hierarchy within API Manager, we need to configure it as a federated identity provider. This documentation uses WSO2 Identity Server 7.1.0 as an example, due to its built-in organization support.
For more information on setting up WSO2 Identity Server 7.1.0, see Setup WSO2 Identity Server as a federated authenticator
Set Up WSO2 API Manager
-
Import Keymanager certificate to WSO2 API Manager client-truestore.jks. Use following steps.
Export WSO2 IS certificate.
openssl s_client -connect localhost:9444 -servername wso2is7 | openssl x509 > is7.certImport this certificate to the
client-truststore.jksinAM_HOME/repository/resources/security/keytool -import -alias wso2is7cert -file is7.cert -keystore client-truststore.jks -storepass wso2carbon -
Need to add new local claim to store organization id. For that go to Home > Identity > Claims> Add and select
Add Local Claimand fill the form. Use Claim URI as http://wso2.org/claims/organizationId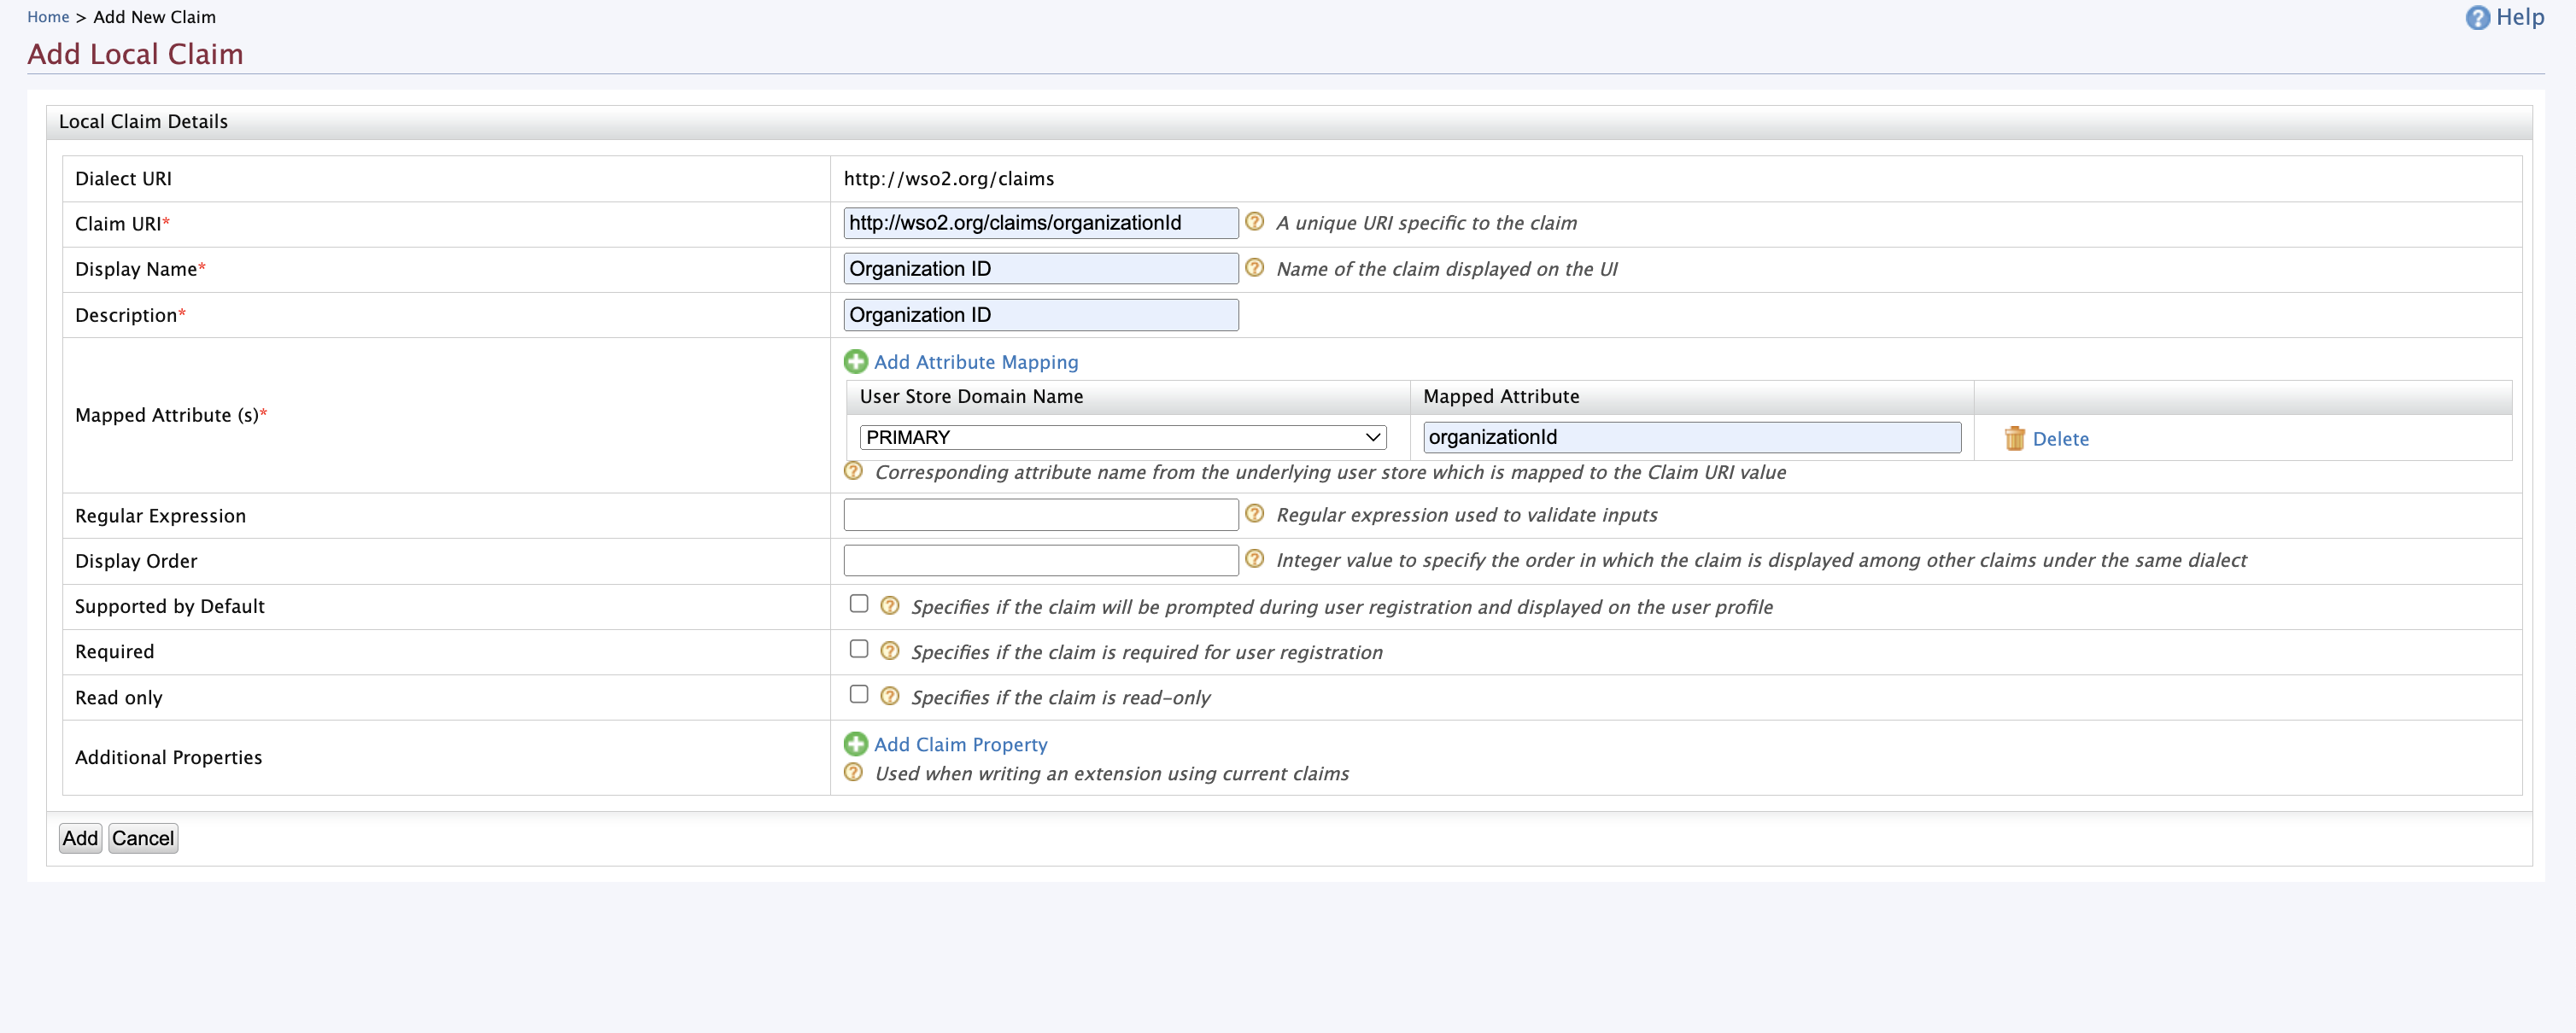
-
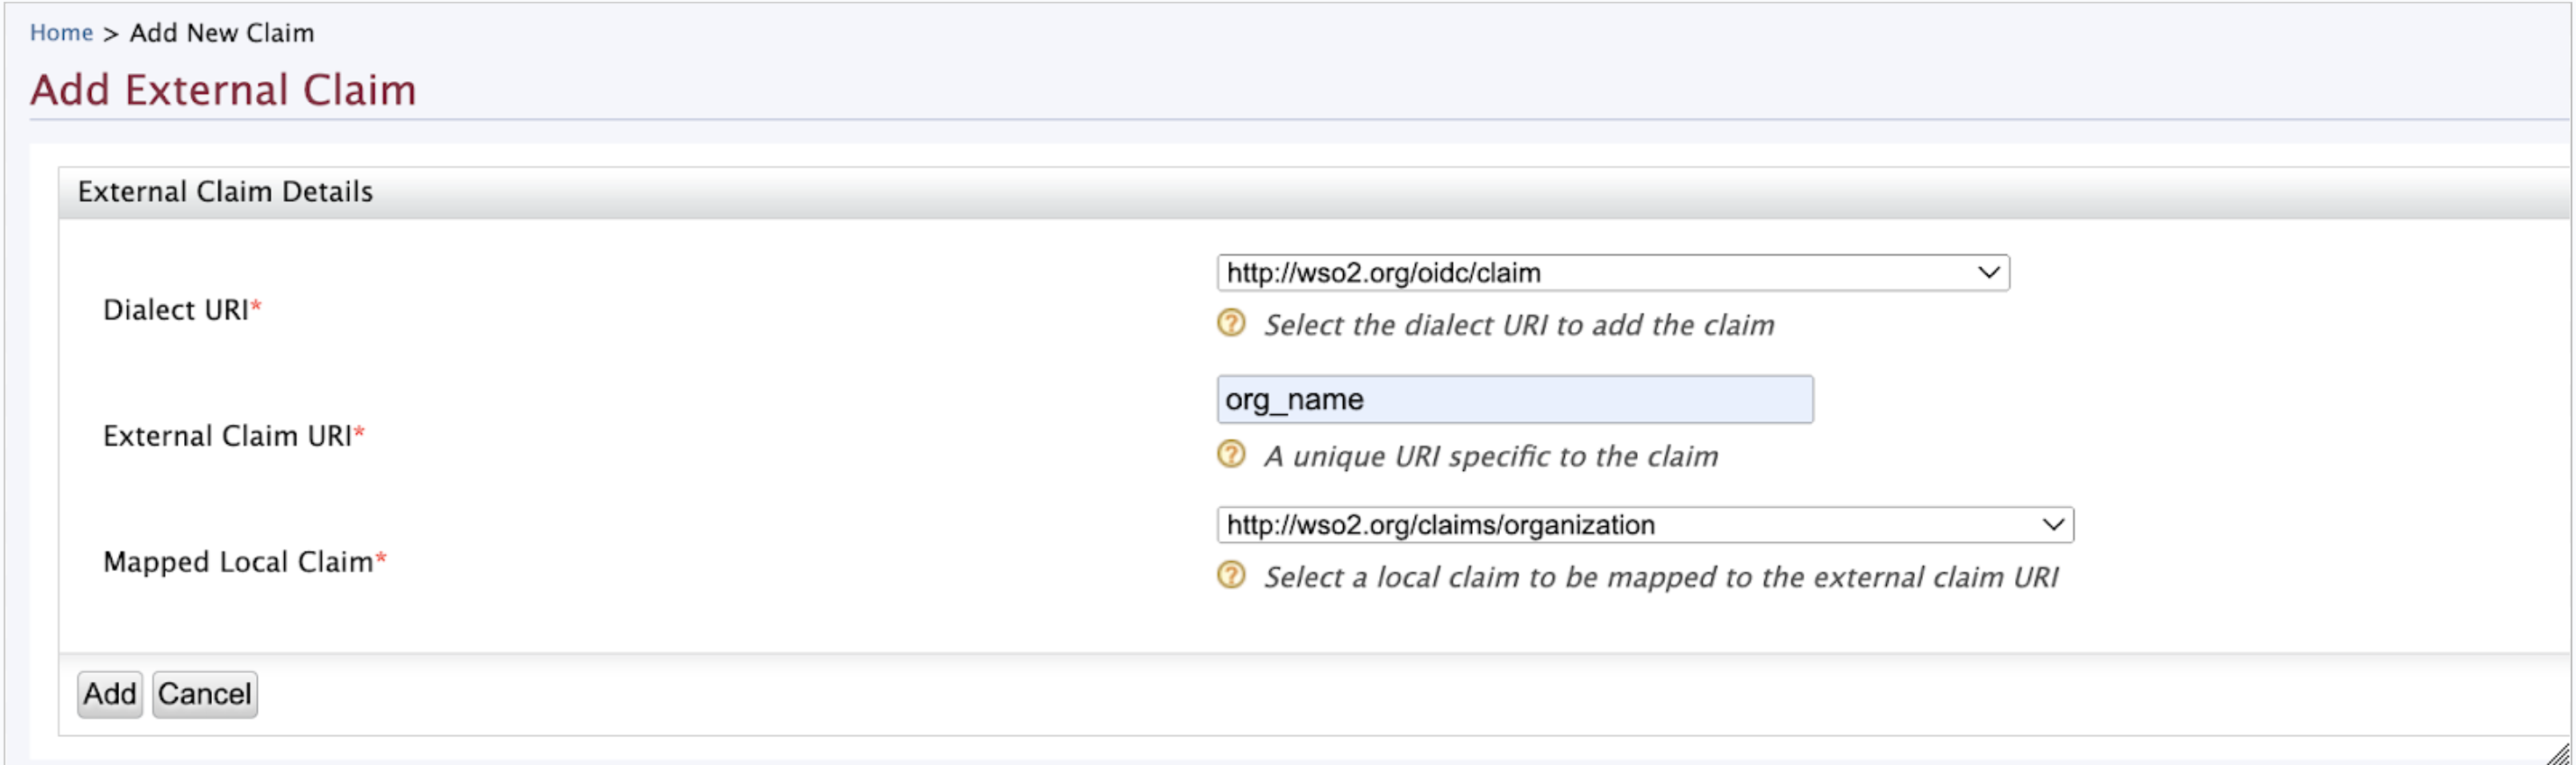
Need to add
org_idandorg_nameto oidc claims and map them to http://wso2.org/claims/organizationId and http://wso2.org/claims/organization local claims. For that go to Home > Identity > Claims> Add and selectAdd External Claim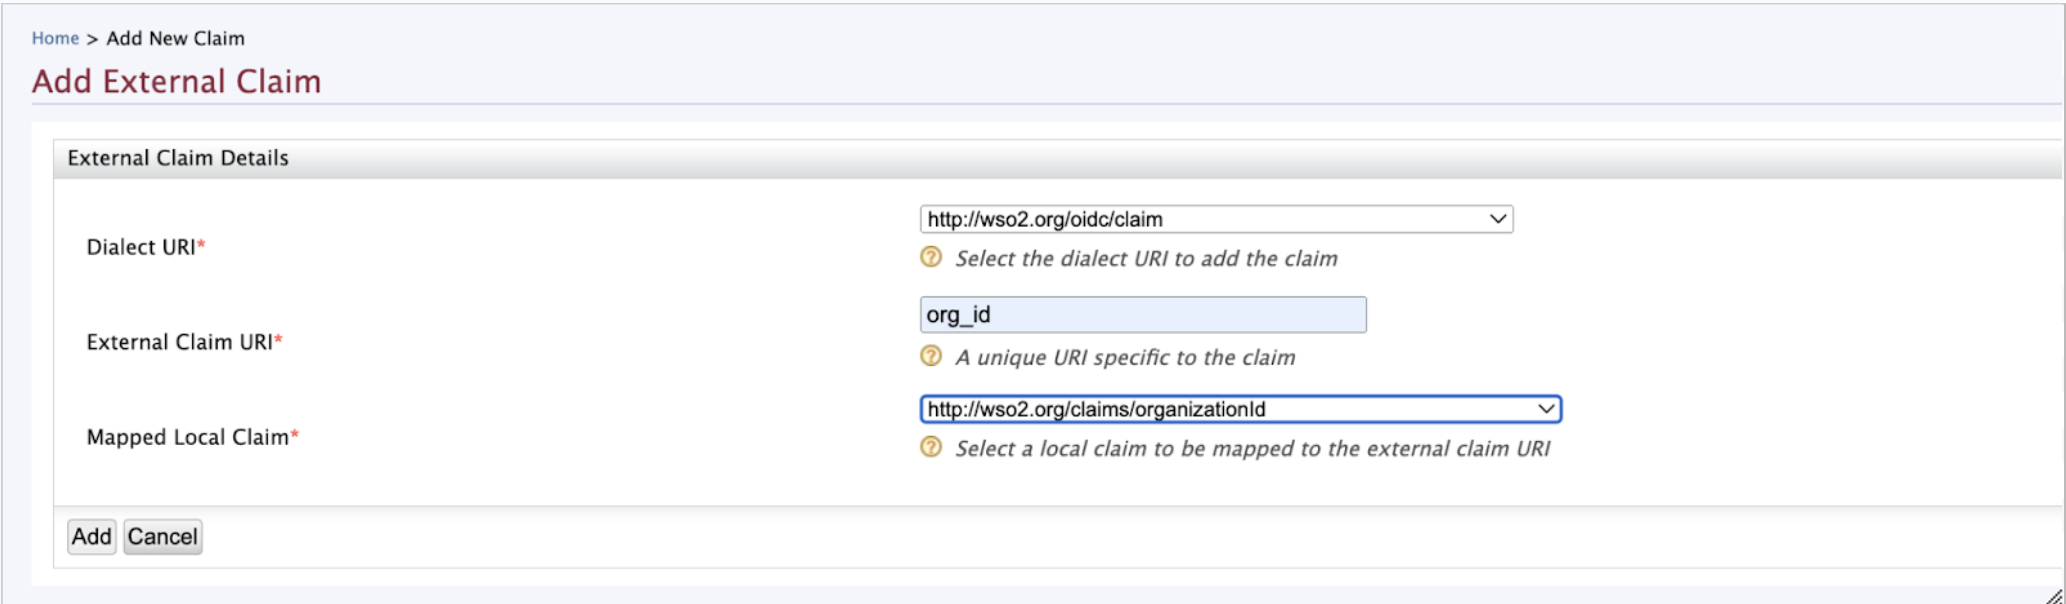
-
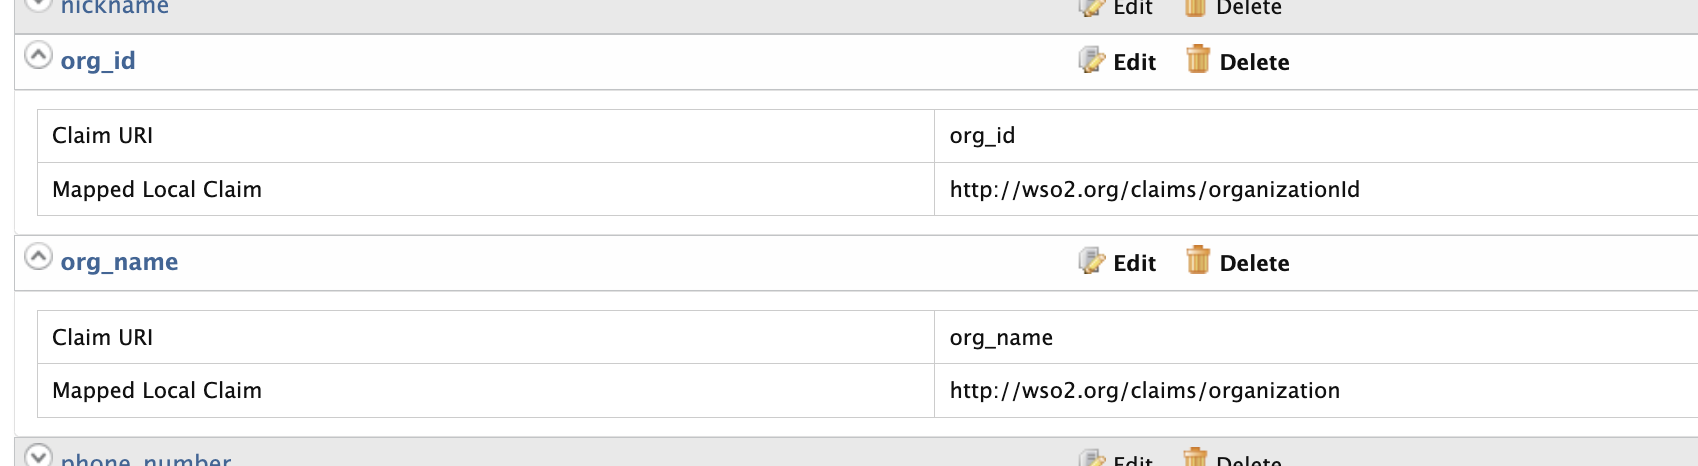
Once added, it will be visible under the http://wso2.org/oidc/claim claim
-
Now we need to configure WSO2 IS 7.1 as a federated IDP for API Manager. For that. Create a new Identity provider by selecting
Identity Providers→Add. Set a name to the IDP -
Expand
Claim Configurationand thenBasic Claim Configuration. Select ‘Define Custom Claim Dialect’ radio button and add following claim mapping usingadd claim mappingbutton. -
Set the user id claim as
usernameand Role claim URI asroles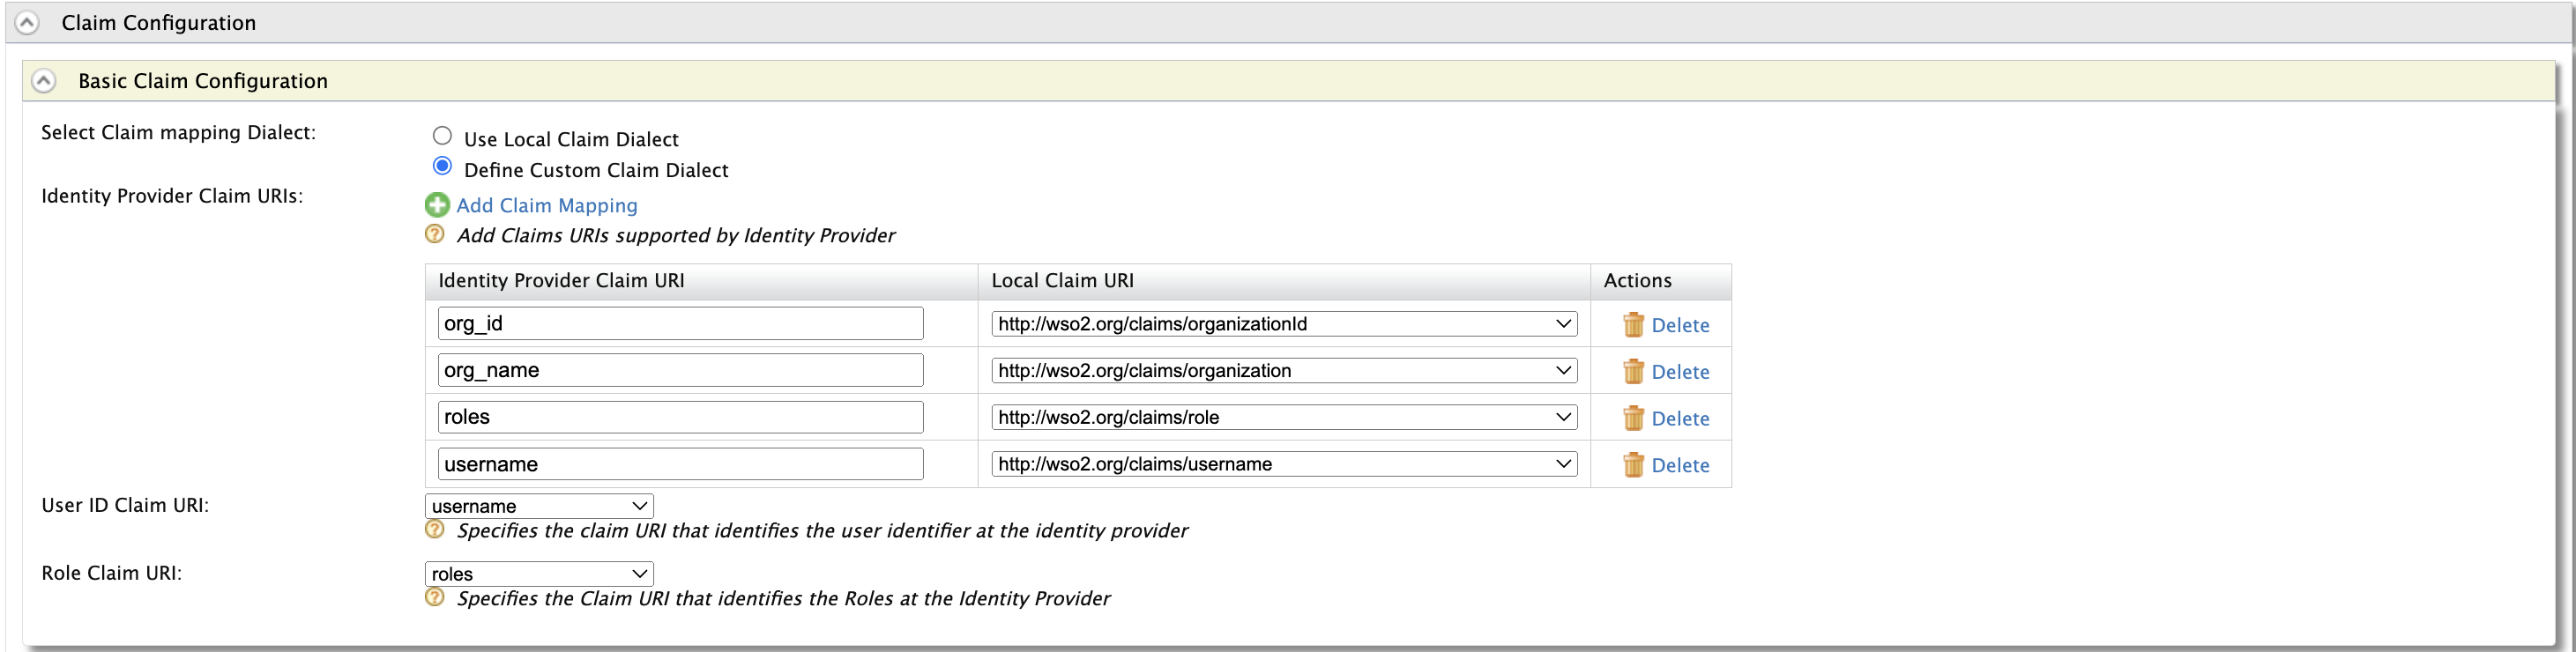
Note
org_name,org_id,username,rolesare oidc claims sent from WSO2 IS. If external IDP is configured, map the corresponding claims. -
Under the
Role Configuration, Map IDP roledevportalto local roleInternal/subscriber. Do similar configurations to other roles as below.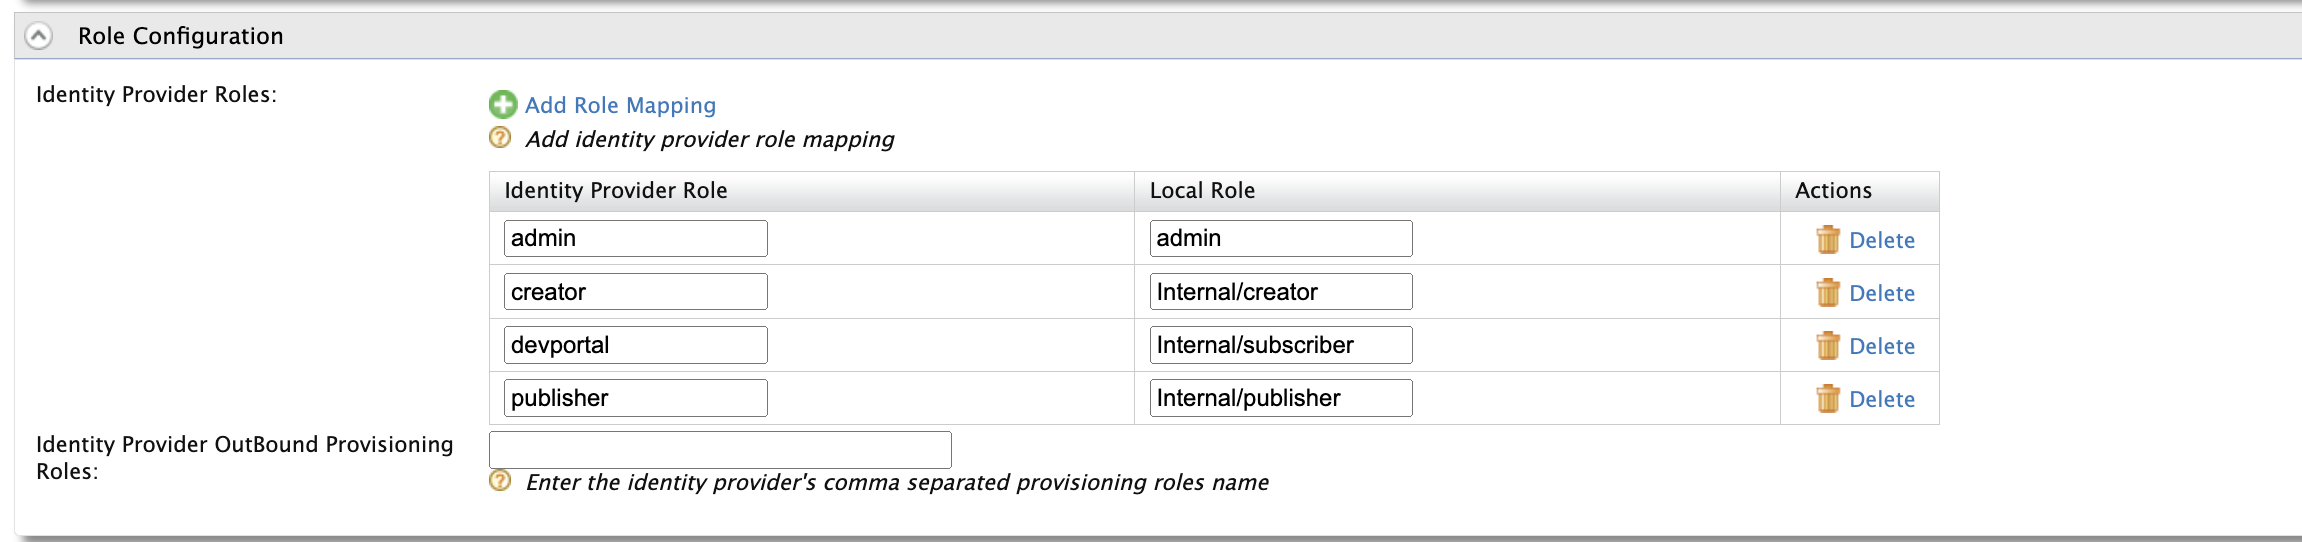
-
Under the
Federated Authenticatorssection, configure IS 7 as the federated authenticator using oauth2 application related information.Enable Oauth2/OpenIDConnect : true Scopes : openid profile roles Callback URl: https://localhost:9443/commonauth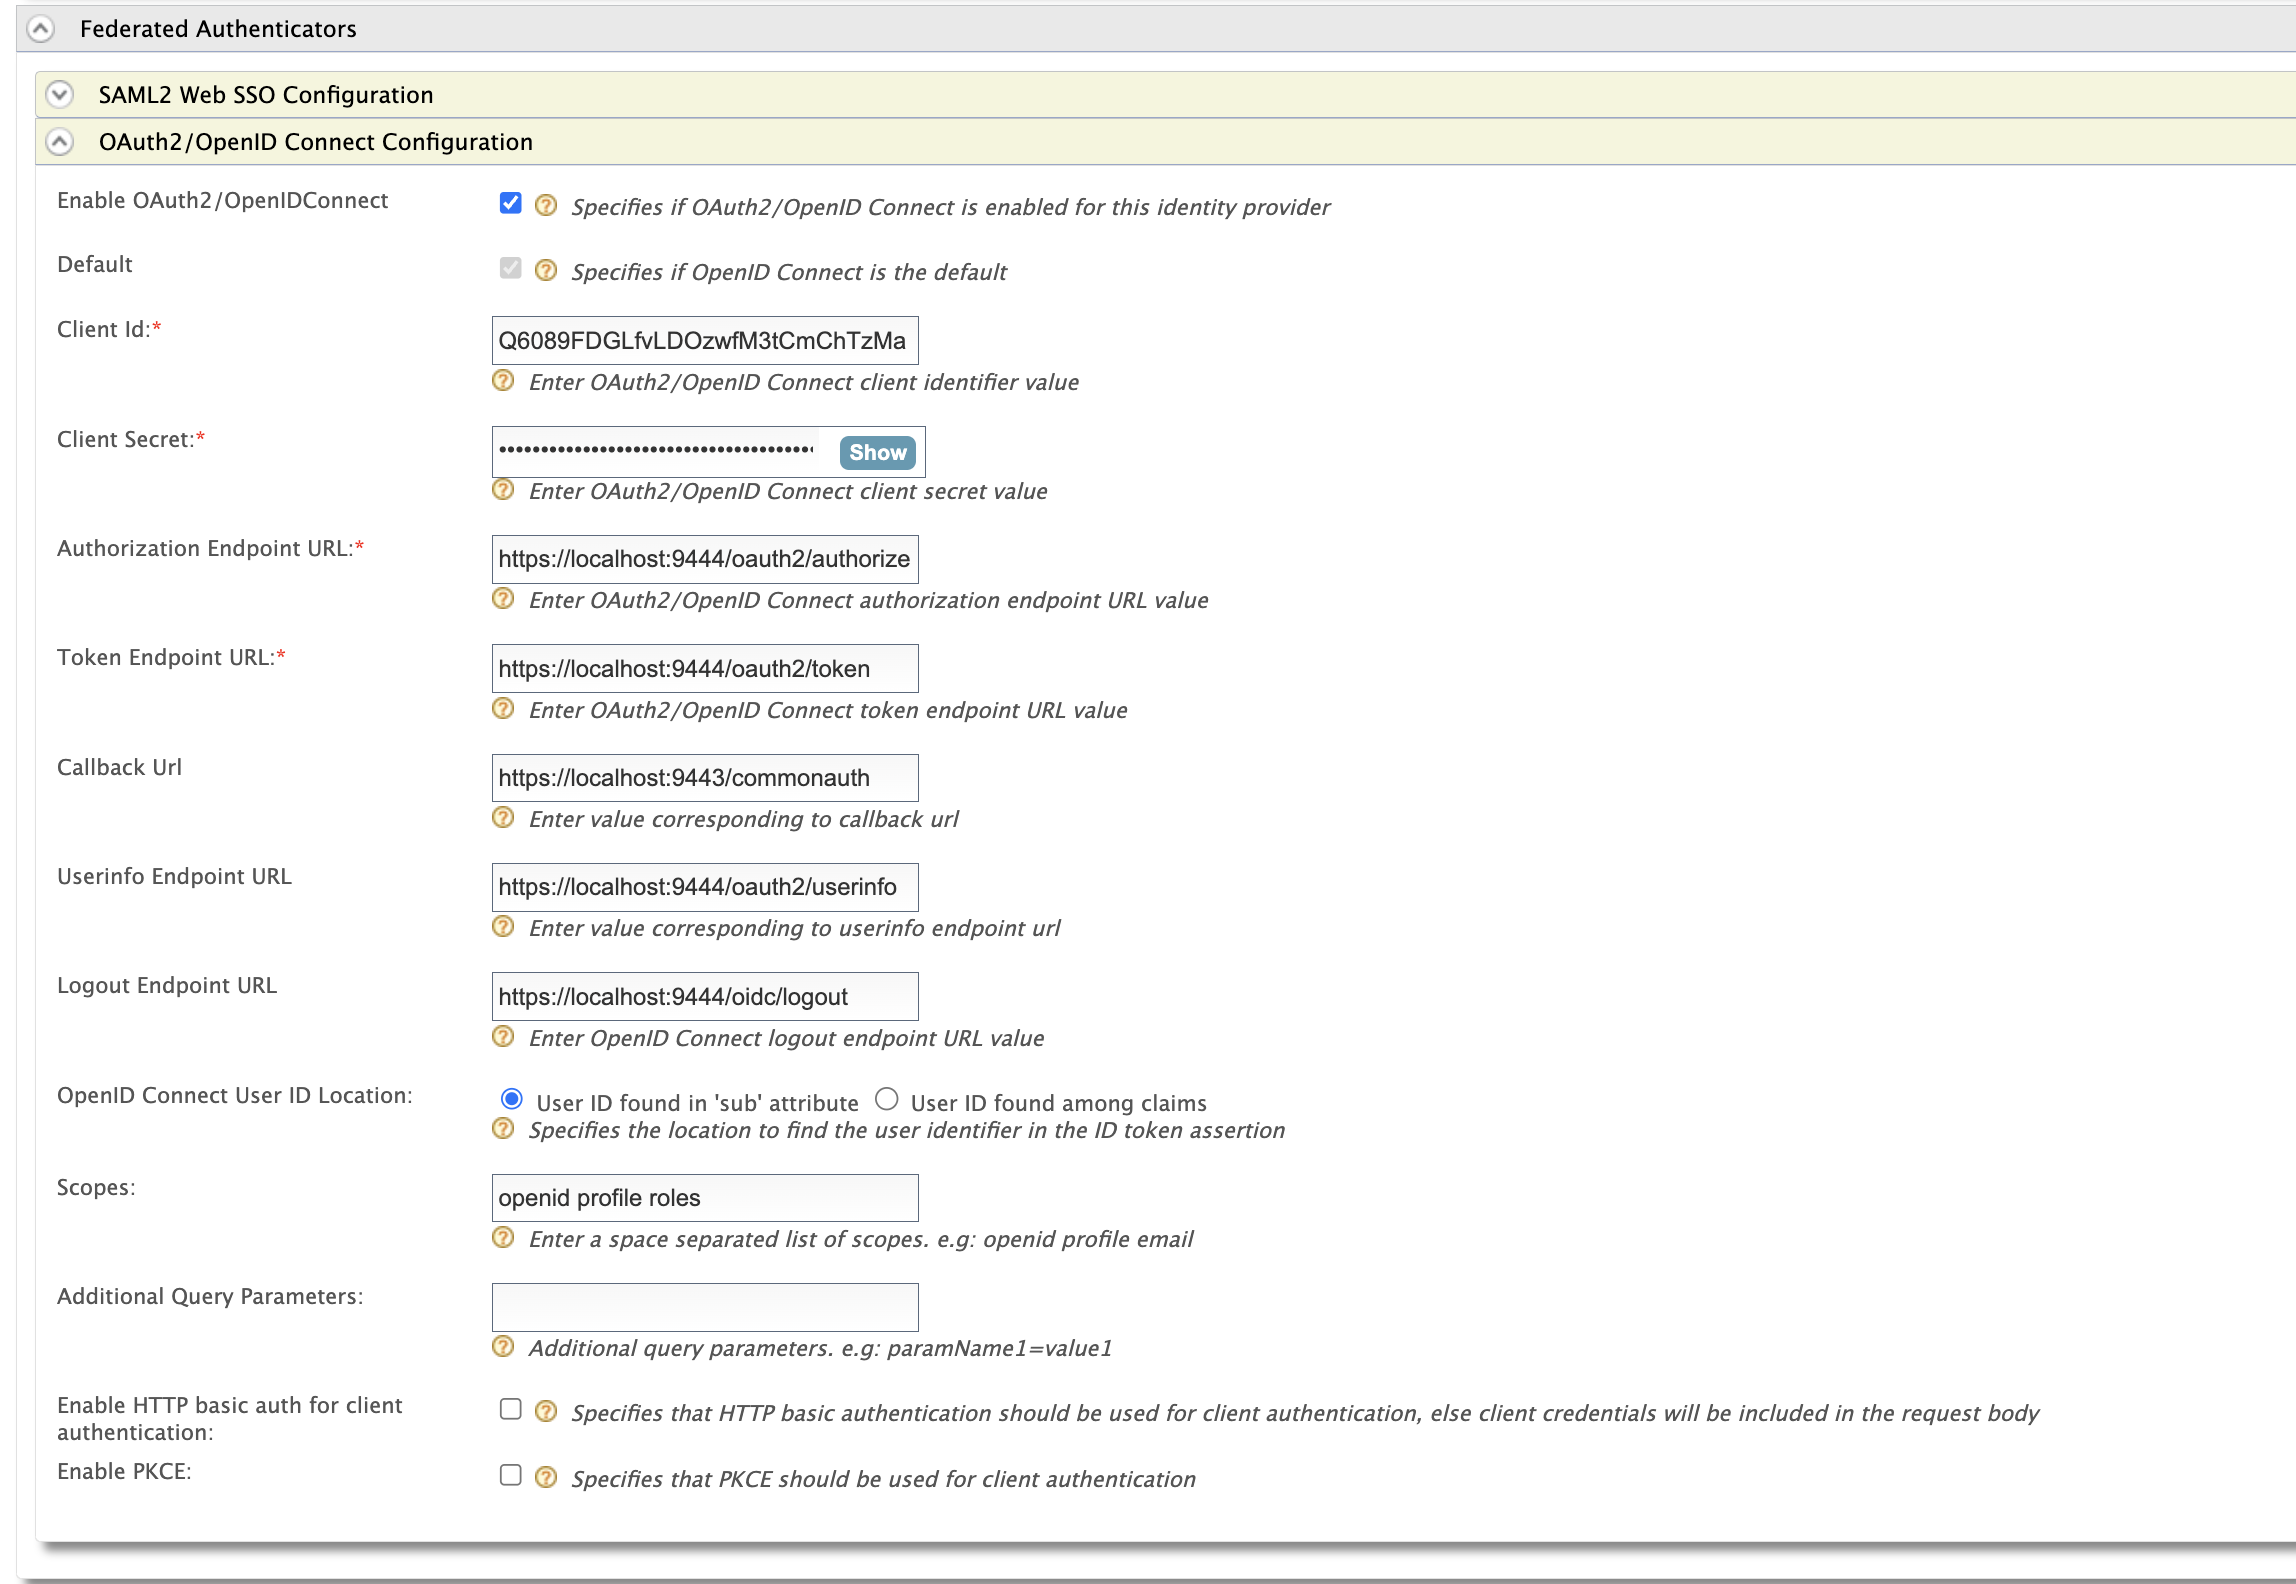
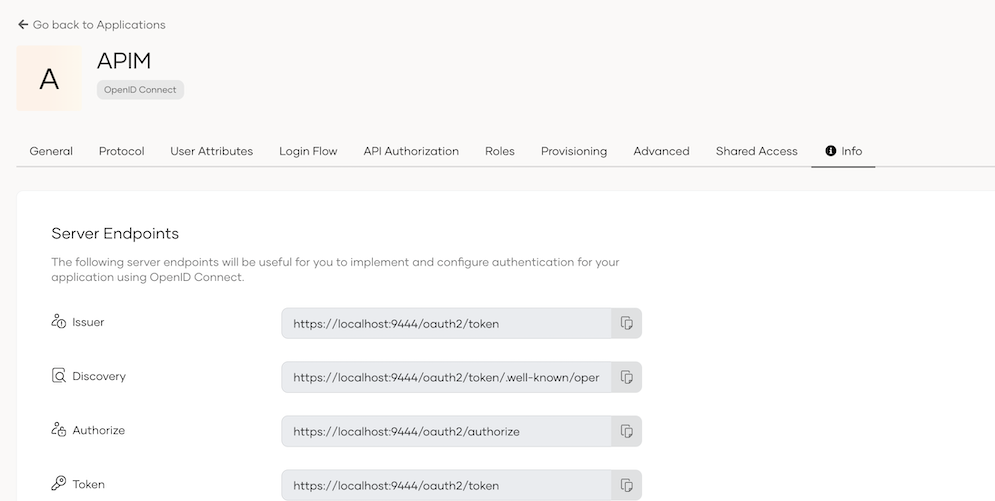
Urls for other endpoints can be found in ‘info’ tab in the application created in identity server.
-
Under
Just-in-Time ProvisioningSet provisioning as below. Finish the IDP configuration by clicking on the Register button.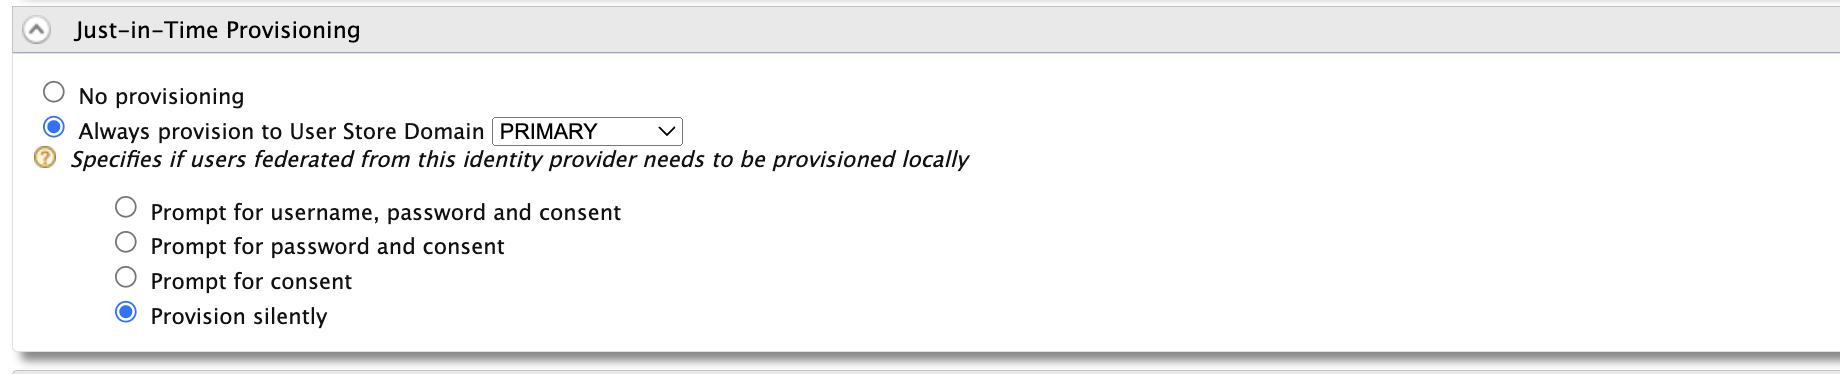
-
Now you need to configure authenticators for the service providers. Go to the
service providerssection and select the edit button inapim_devportal.
Note
If these service providers are not available, you need to first login to the developer portal and this will be created automatically.
-
Under the
Local & Outbound Authentication Configurationsection, set the identity provider we created previously under the `Federated Authentication’ section.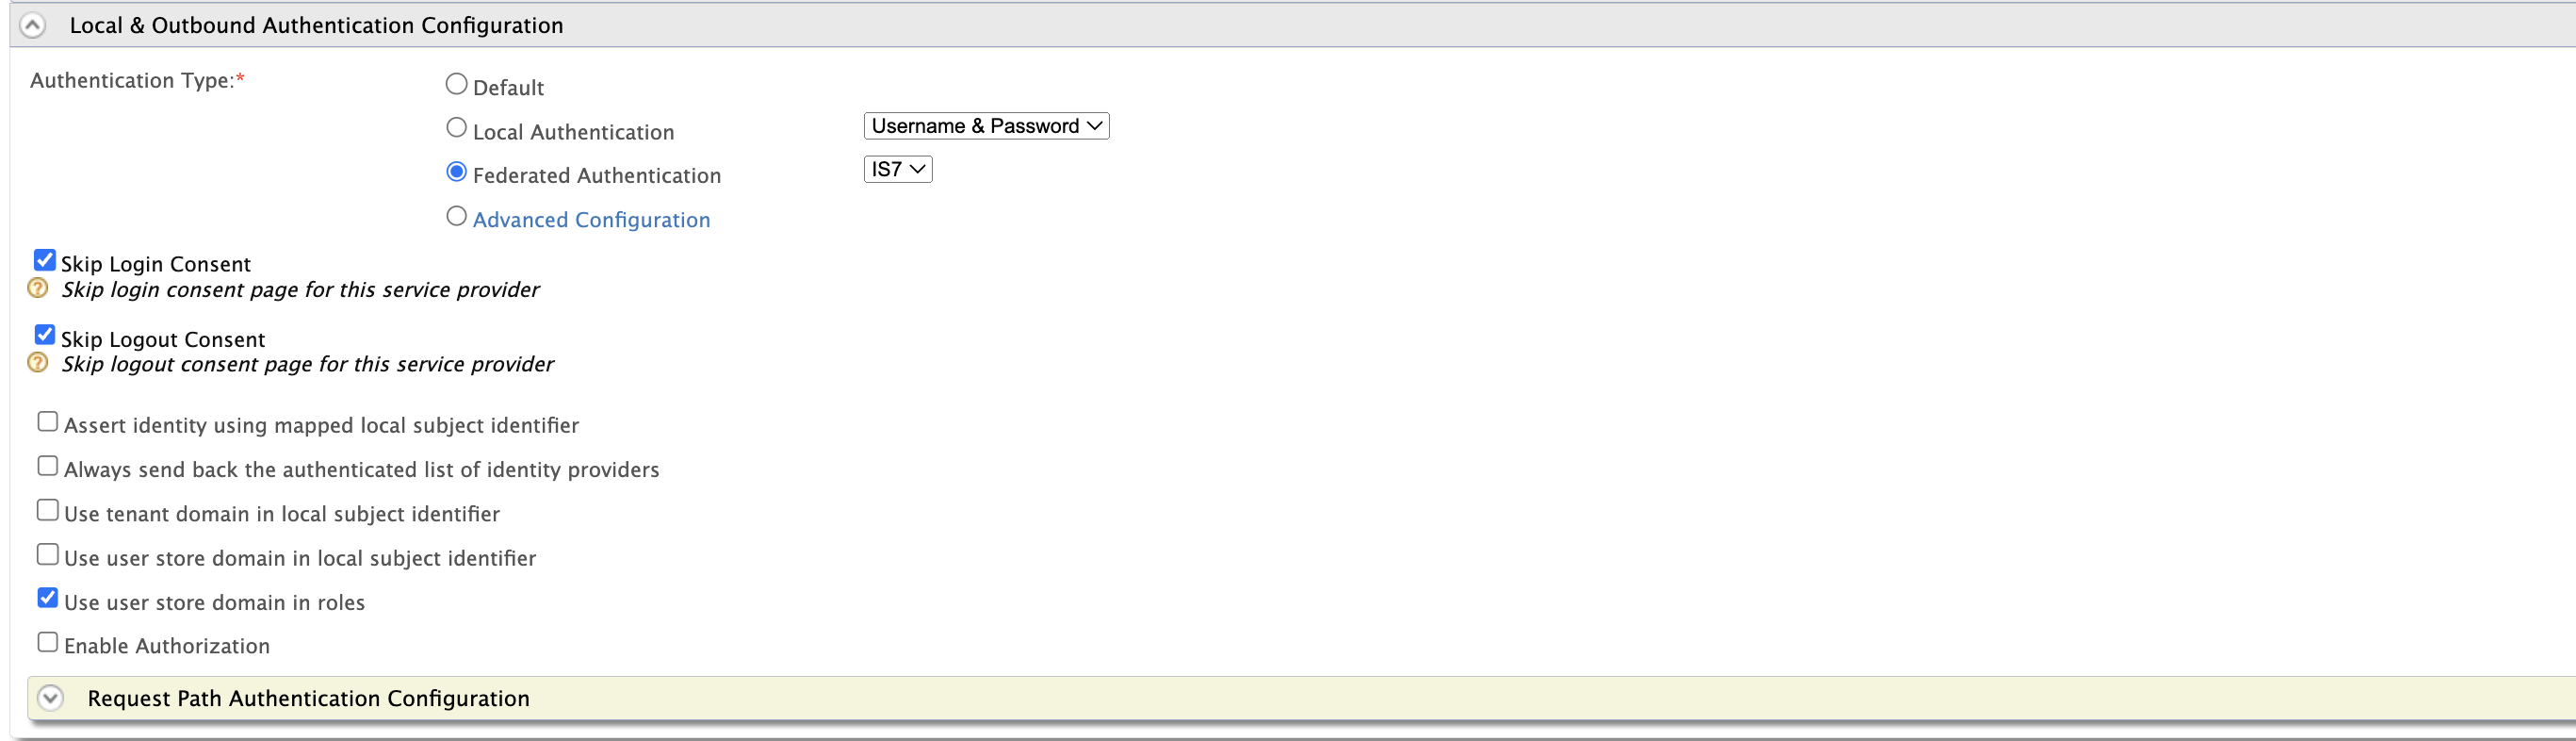
-
Similarly do the same for other portal’s service providers
Register Organizations in API Manager
First you need to map the organization in the identity server in the API manager. For that,
-
log in to Admin portal https://localhost:9443/admin/ using
orgadmin.Note
You cannot use admin/admin for this because locally created admin user does not belong to any organization.
-
Go to
OrganizationsTab and selectRegister Organization. Use the organization ids you got during organization registration step in WSO2 IS.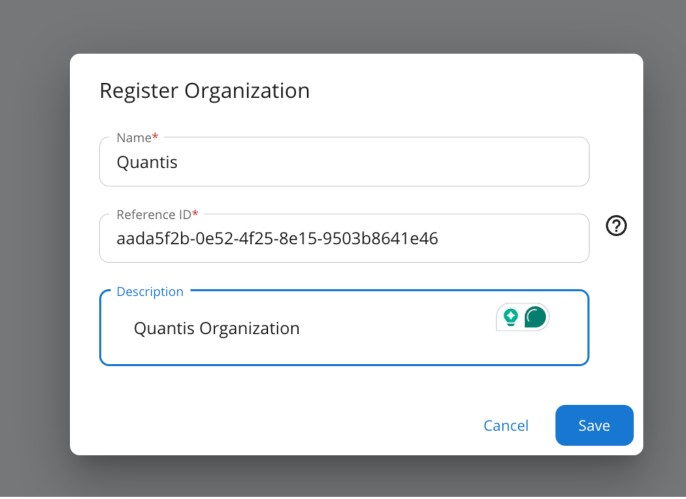
Register Organization-specific key managers
WSO2 IS 7.1 provides the capability to register OAuth applications within organizations. As a result, it will have organization-specific URLs for OAuth-related operations. We will register organization-specific key managers and set visibility exclusively for users within the organization.
- Login to admin portal using
orgadminand go toKey Managerssection and add new keymanager. - Add name and display name. Select keymanager type as
WSO2 Identity Server 7 -
Fill the form using following. Replace the
org_idwith theexternal reference Idused during org registration. You could use https://localhost:9444/oauth2/token/.well-known/openid-configuration as the well-known url and then replace the followingEndpoint URL Issuer https://localhost:9444/oauth2/tokenClient Registration Endpoint https://localhost:9444/t/carbon.super/o/<org_id>/api/identity/oauth2/dcr/v1.1/registerIntrospect Endpoint https://localhost:9444/t/carbon.super/o/<org_id>/oauth2/introspectToken Endpoint https://localhost:9444/t/carbon.super/o/<org_id>/oauth2/tokenToken Display Endpoint https://localhost:9444/t/carbon.super/o/<org_id>/oauth2/tokenRevoke Endpoint https://localhost:9444/t/carbon.super/o/<org_id>/oauth2/revokeDisplay Revoke Endpoint https://localhost:9444/t/carbon.super/o/<org_id>/oauth2/revokeAuthorize Endpoint https://localhost:9444/t/carbon.super/o/<org_id>/oauth2/authorizeScope Management Endpoint https://localhost:9444/api/identity/oauth2/v1.0/scopesWSO2 Identity Server 7 API Resource Management Endpoint https://localhost:9444/api/server/v1/api-resourcesWSO2 Identity Server 7 Roles Endpoint https://localhost:9444/scim2/v2/Roles -
Under the
Available Organizationssection, select the organization
-
Under
Advanced Configurationssection, setToken Handling Optionsas JWT and set the organization id used previoiusly for keymanager registration as below.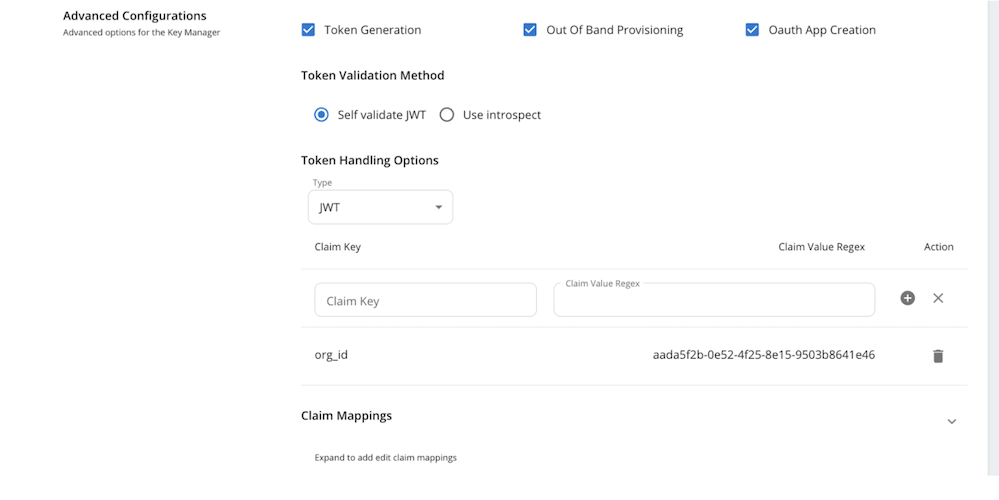
Set Organization Visibility for APIs
We can set APIs to be visible for users in all organizations, current organization, or set of organizations.
- Login to publisher portal using a user with creator and publisher roles. In this example,
larry - Create an API and fill the required data.
- Go to the
Lifecyclepage and publish the API -
At the top bar, select 'Share' button.

-
Select which organization you need to share and select organization specific business plans as well and save.
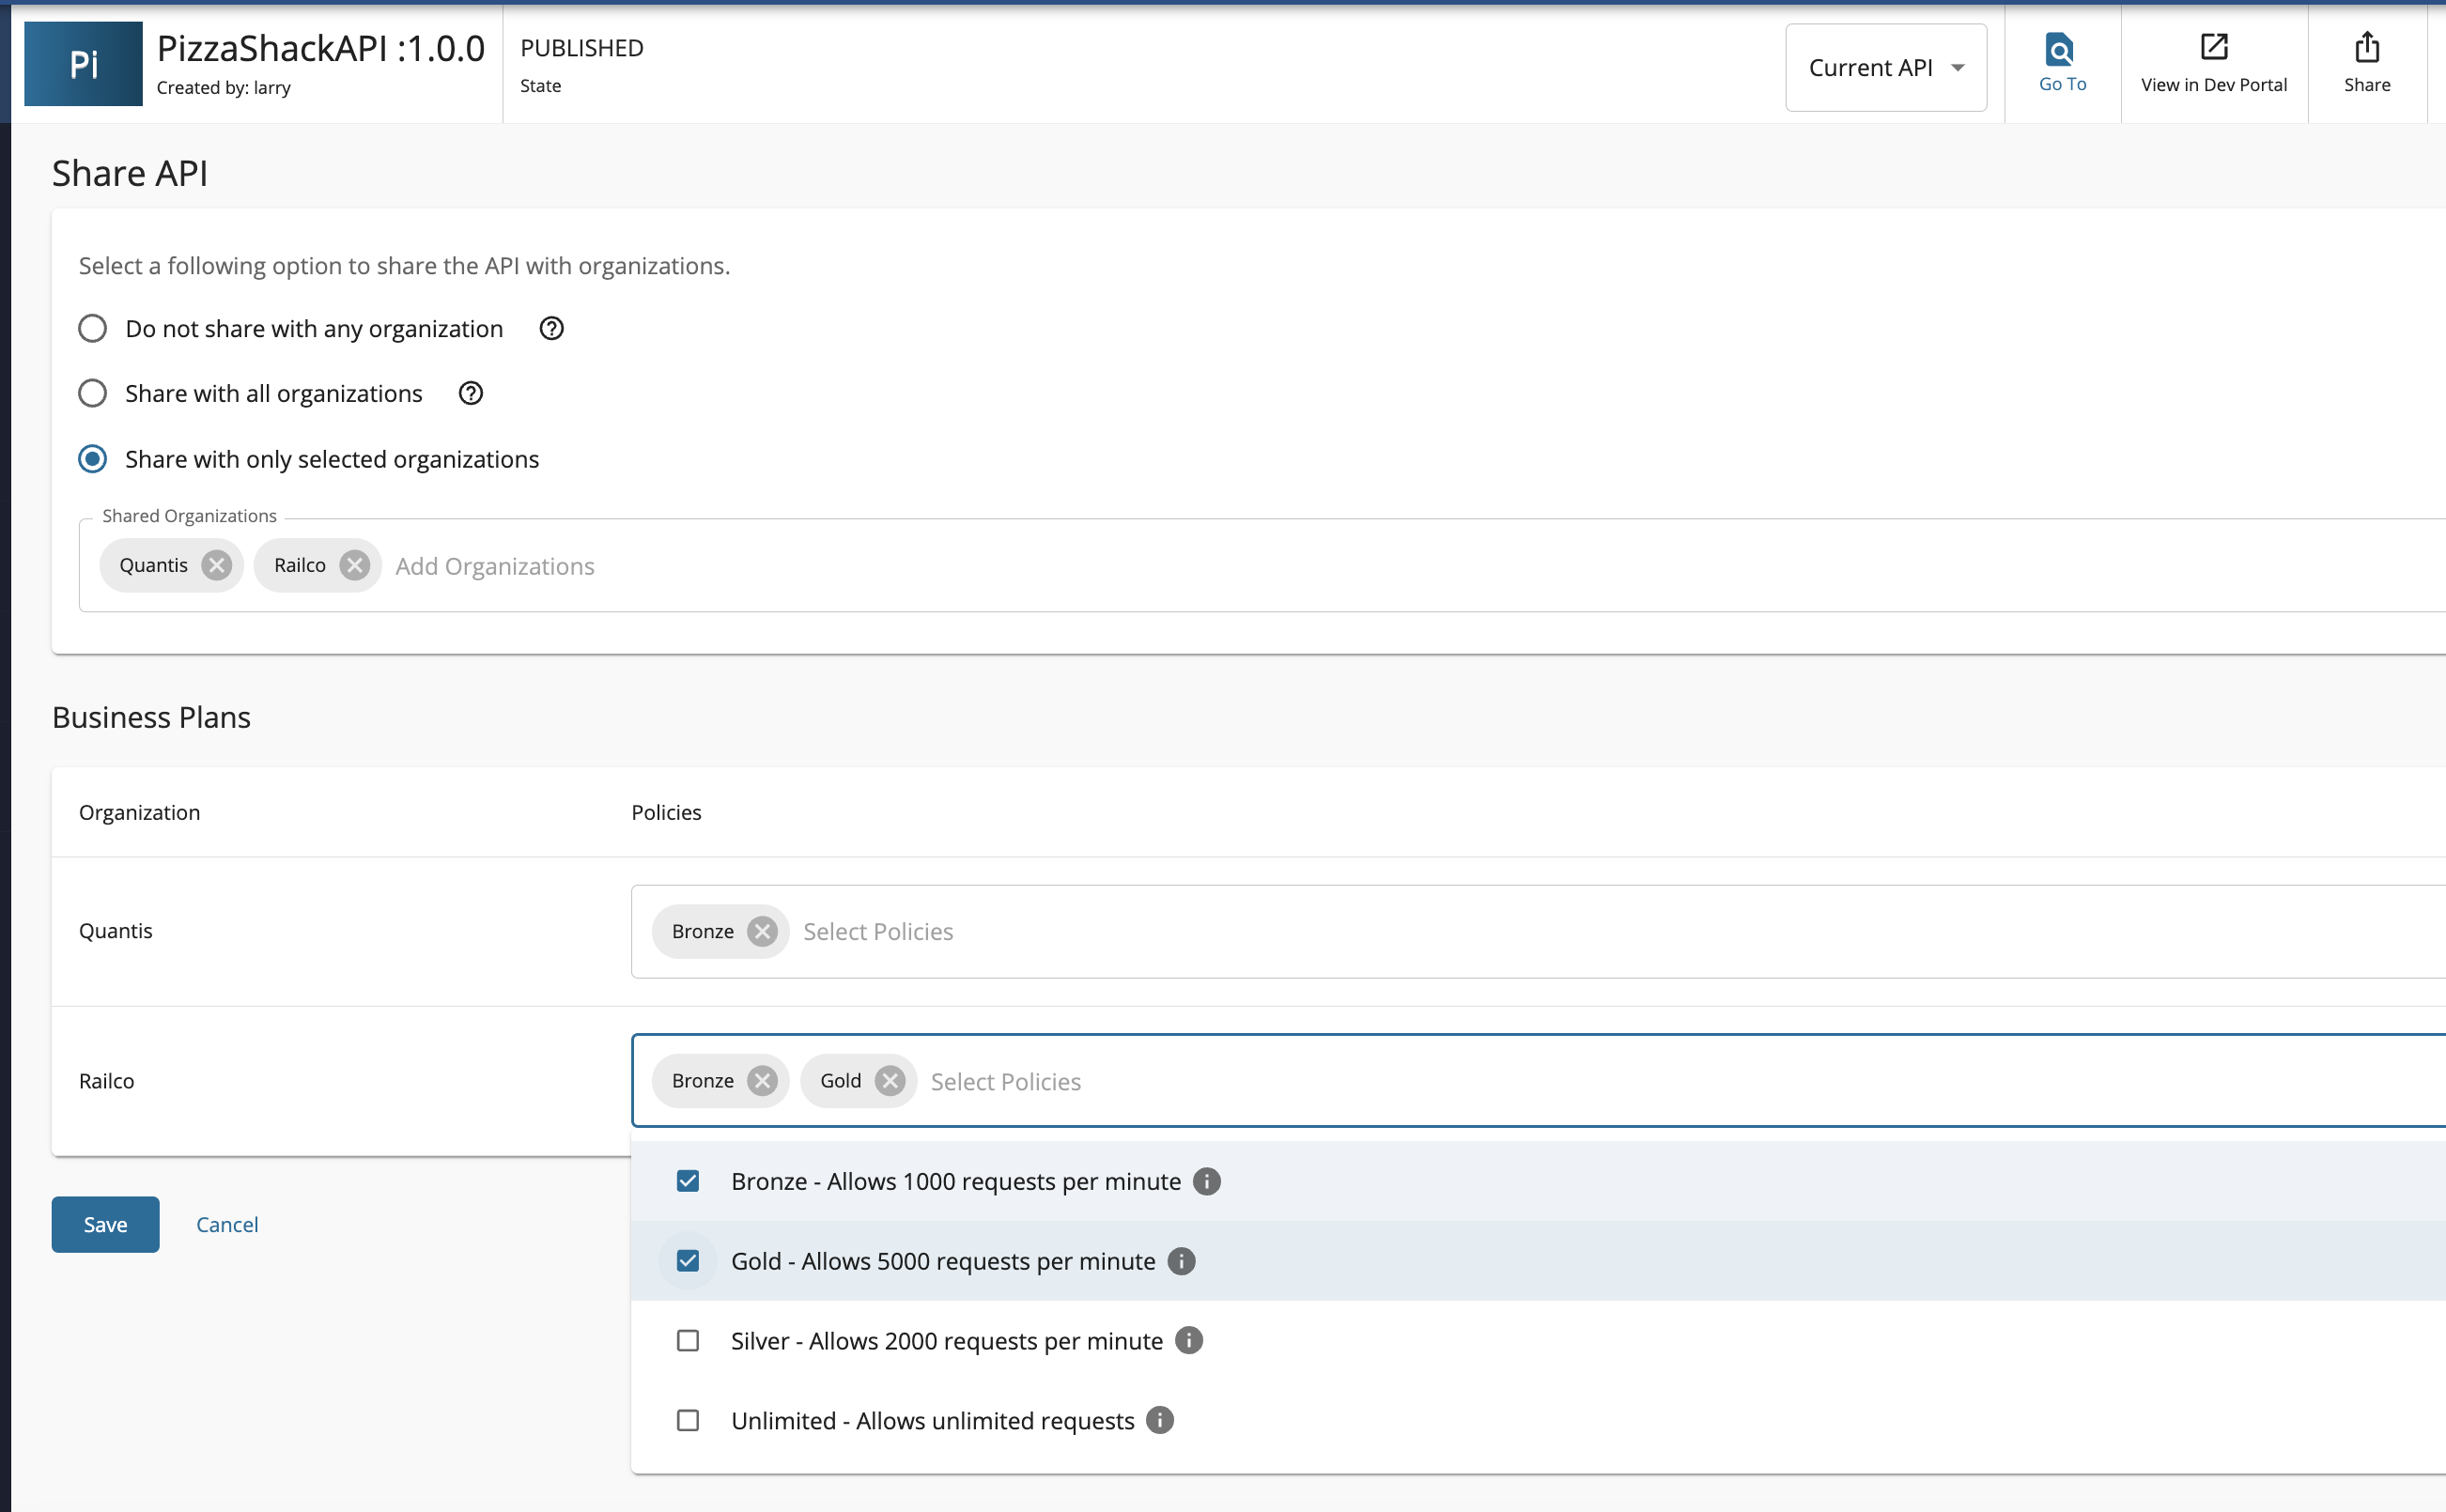
Note
APIs with Developer Portal visibility set to 'public' are still not visible on the anonymous Developer Portal page if they have been shared with an organization. To make them visible in the Developer Portal without user login, set the organization visibility to 'All Organizations'.
Note
Organization visibility is not supported for API product for this release.
Login to developer portal and invoke the API.
-
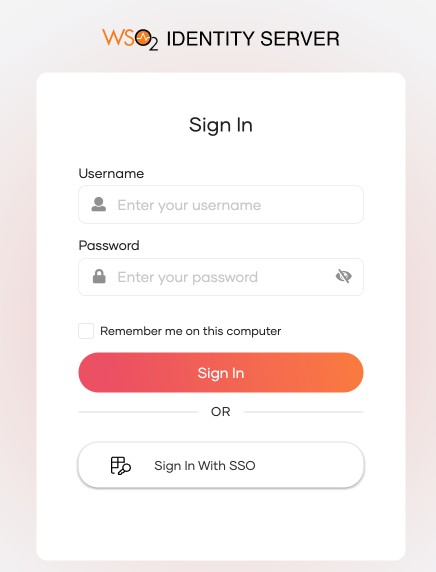
Go to developer portal and click login button
-
Use the SSO option and give the organization name.
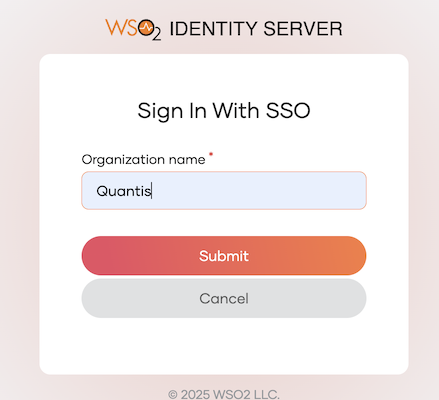
-
You should be able to see APIs shared with this organization.
-
Lets create an application. You have the option to share the application with all the users within the organization as well.
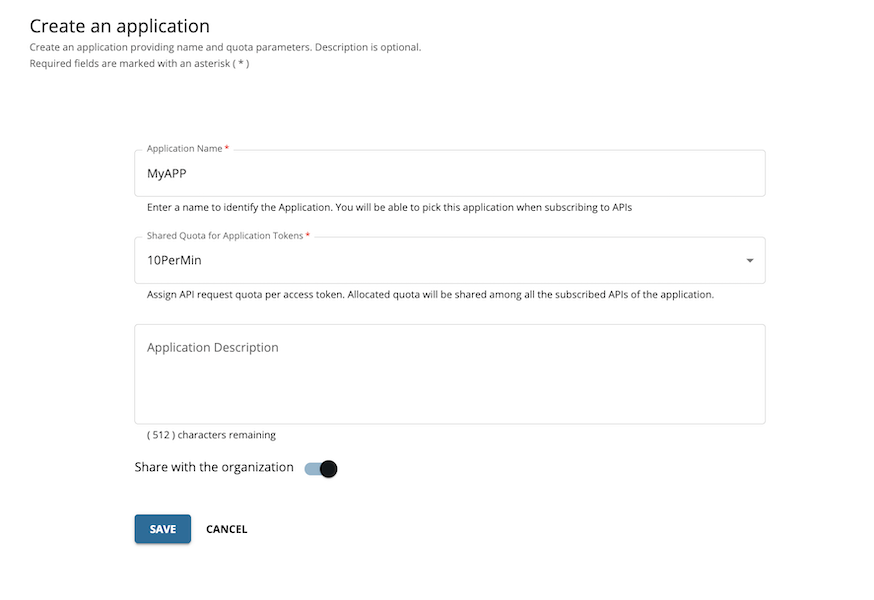
-
Under the application keys sections, you would see the keymanager specifically set for this organization.

-
You should be able to generate an access token and invoke the API now.
-
Logout and attempt to log in again with a different user from another organization.
Note
When running both API Manager and WSO2 Identity Server on the same host (localhost), you may encounter an issue where a Developer Portal user does not log out when switching between two users within the same organization. This occurs due to both servers sharing the same host. In a production setup, this issue does not arise as the servers are hosted separately. To overcome this issue, you can use a private browser window for testing locally or set up WSO2 Identity Server on a different host.
If the Identity Server is running on a different host and you encounter an issue with logout session removal, set the
logoutSessionStateAppenderto an empty value in the following configuration.<AM_HOME>/repository/deployment/server/webapps/publisher/site/public/conf/settings.json <AM_HOME>/repository/deployment/server/webapps/admin/site/public/conf/settings.json <AM_HOME>/repository/deployment/server/webapps/devportal/site/public/theme/settings.json
Tip
Although this feature is enabled by default, organization visibility features are only available after you register organizations. You could specifically disable this feature by adding
[apim.organization_based_access_control]
enable = true