Deploy an API to Gateway
This guide provides comprehensive instructions for deploying APIs and API Products to the WSO2 Universal Gateway, enabling them to be invoked through Gateway environments.
Info
You can deploy the following to the Gateway:
- APIs: REST, SOAP, SSE, WebSocket, WebSub, GraphQL
- API Products
Overview
API Deployment is the process of making APIs and API Products available for invocation through a Gateway environment. Key points:
- APIs and API Products must be deployed to a Gateway before they can be invoked
- They must also be published to the Developer Portal for subscription
- Deployment uses a revision-based approach for version control
- You can deploy to multiple Gateway environments simultaneously
Note
The steps for deploying APIs and API Products are identical.
What is Undeployment?
Undeploying removes the API or API Product from the selected Gateway environment, making it unavailable for invocation through that Gateway.
Prerequisites
Before deploying, ensure:
- Created: The API or API Product exists in the Publisher Portal
- Endpoint Configured: Valid endpoint URL is configured
- Gateway Environment Available: At least one Gateway environment is configured
- Appropriate Permissions: User has deployment permissions
Understanding Revisions
Revisions are snapshots of your API or API Product configuration at a specific point in time. They enable:
- Version control for API configurations
- Rollback capabilities
- Deployment to multiple environments with different configurations
- Safe testing before production deployment
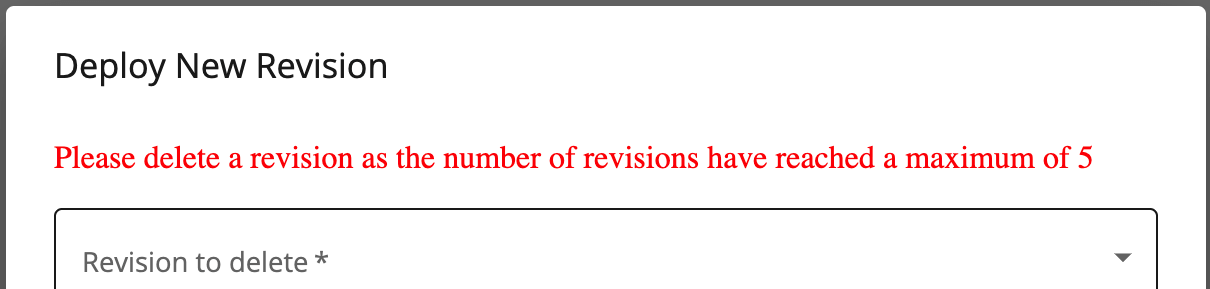
Revision Limitations
Warning
- Maximum of 5 revisions can exist
- To deploy a new revision after reaching the limit, delete an existing revision
- Revisions cannot be edited after creation
Deploying to Gateway
Step 1: Sign in to the Publisher Portal
-
Navigate to the Publisher Portal:
Example:https://<hostname>:9443/publisherhttps://localhost:9443/publisher -
Sign in with your credentials.
-
The list of available APIs appears.
Step 2: Select the API or API Product
-
Click on the API or API Product you want to deploy.
-
Navigate to the Deploy section in the left menu.
-
Click Deployments.
Step 3: Deploy First Revision (New API)
If you haven't deployed any revisions yet, you'll see the following screen:
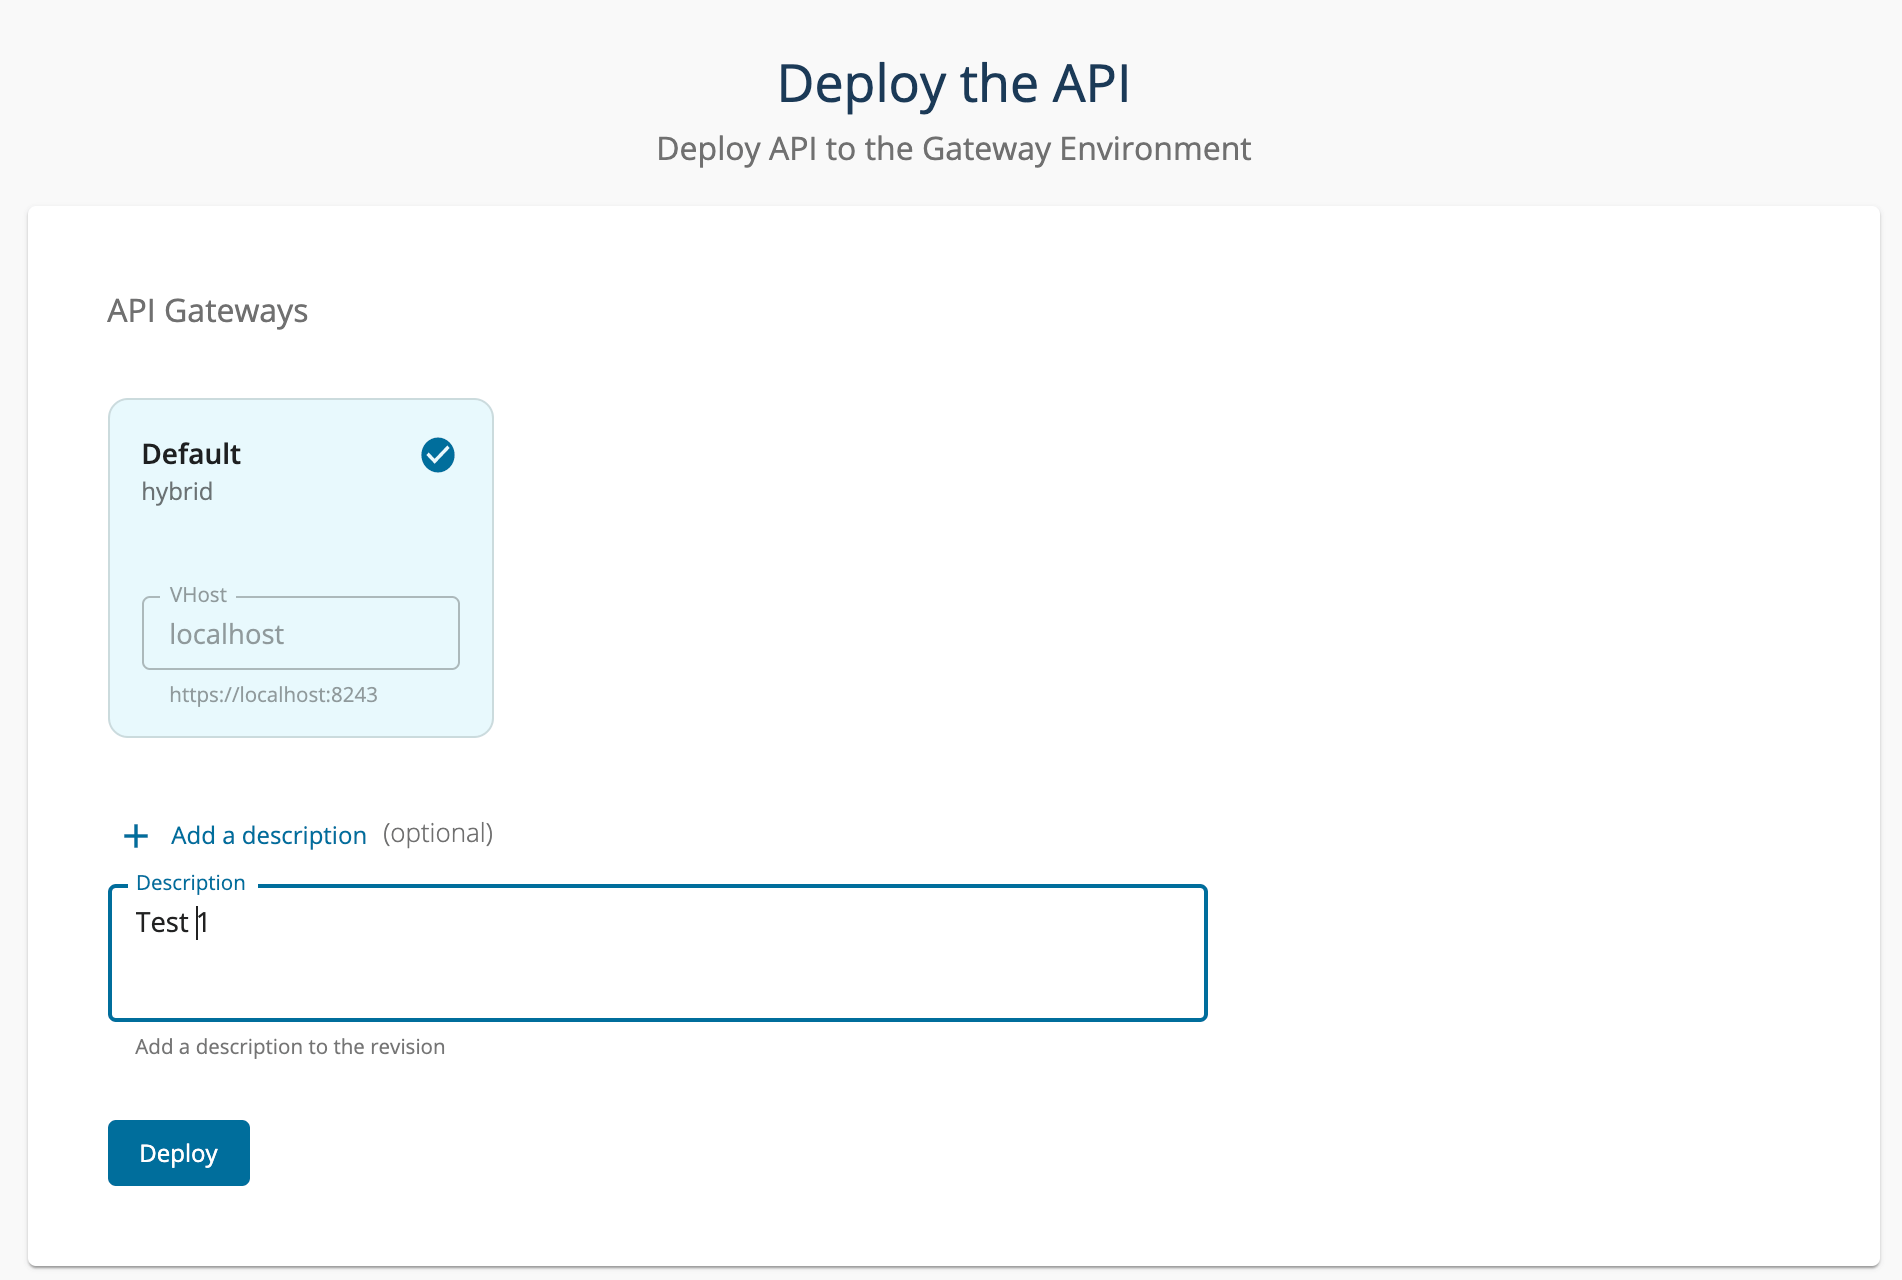
-
Optionally, provide a description for the revision.Good revision descriptions help track changes over time. Example: "Added rate limiting and updated endpoint"
-
Select the API Gateway environments where you want to deploy.
-
Click Deploy
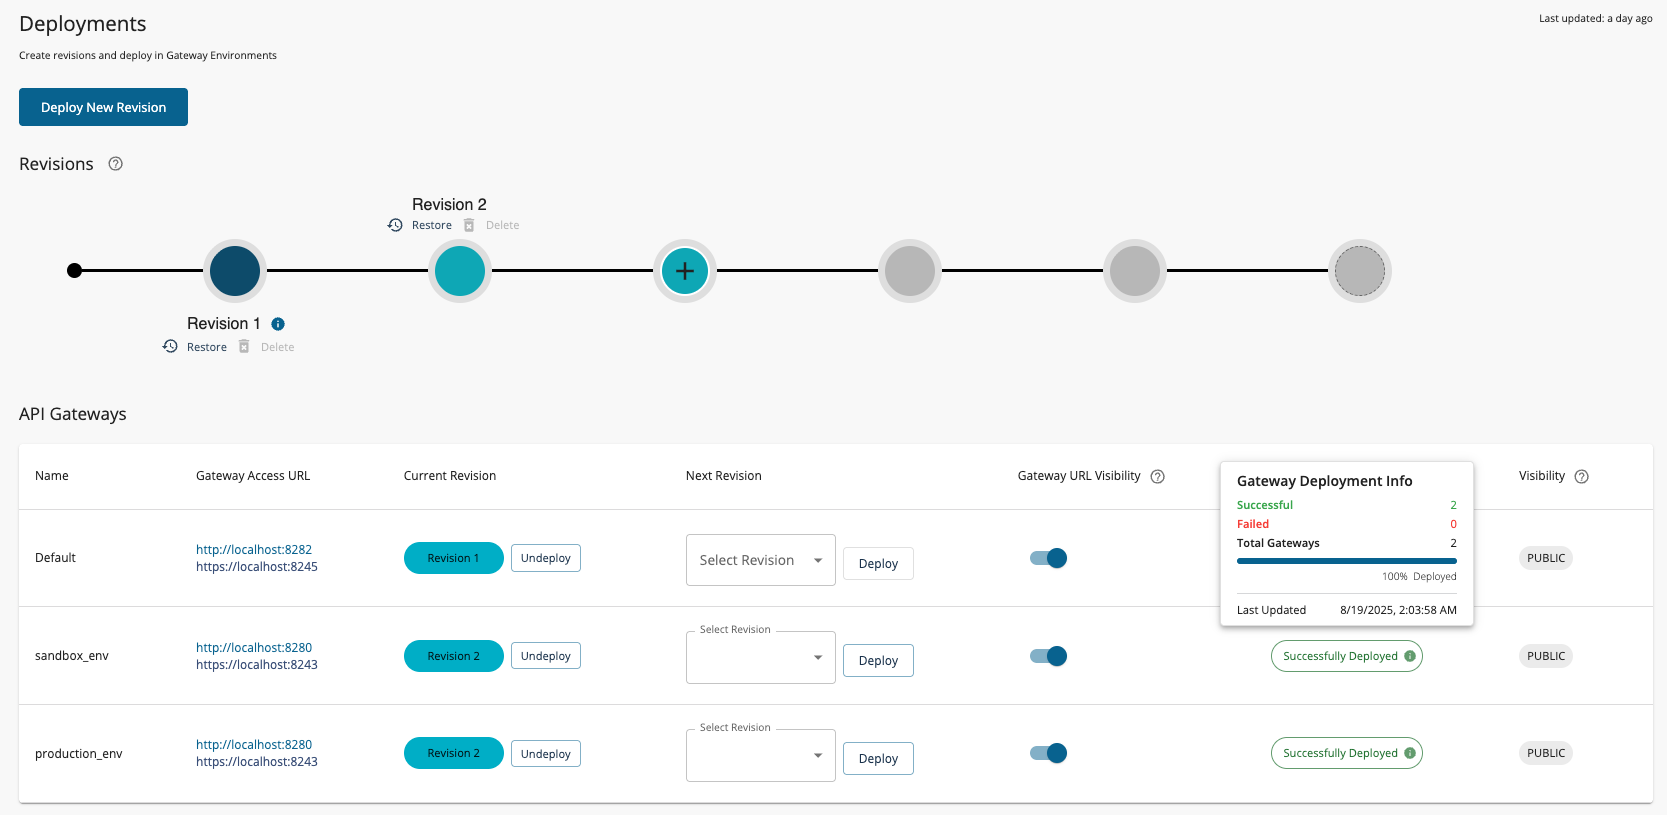
-
Verify deployment status. Hover over the deployment status icon to view detailed information about the deployment.
Step 4: Deploy Additional Revisions
If you already have existing revisions, the Deployments page appears as follows:
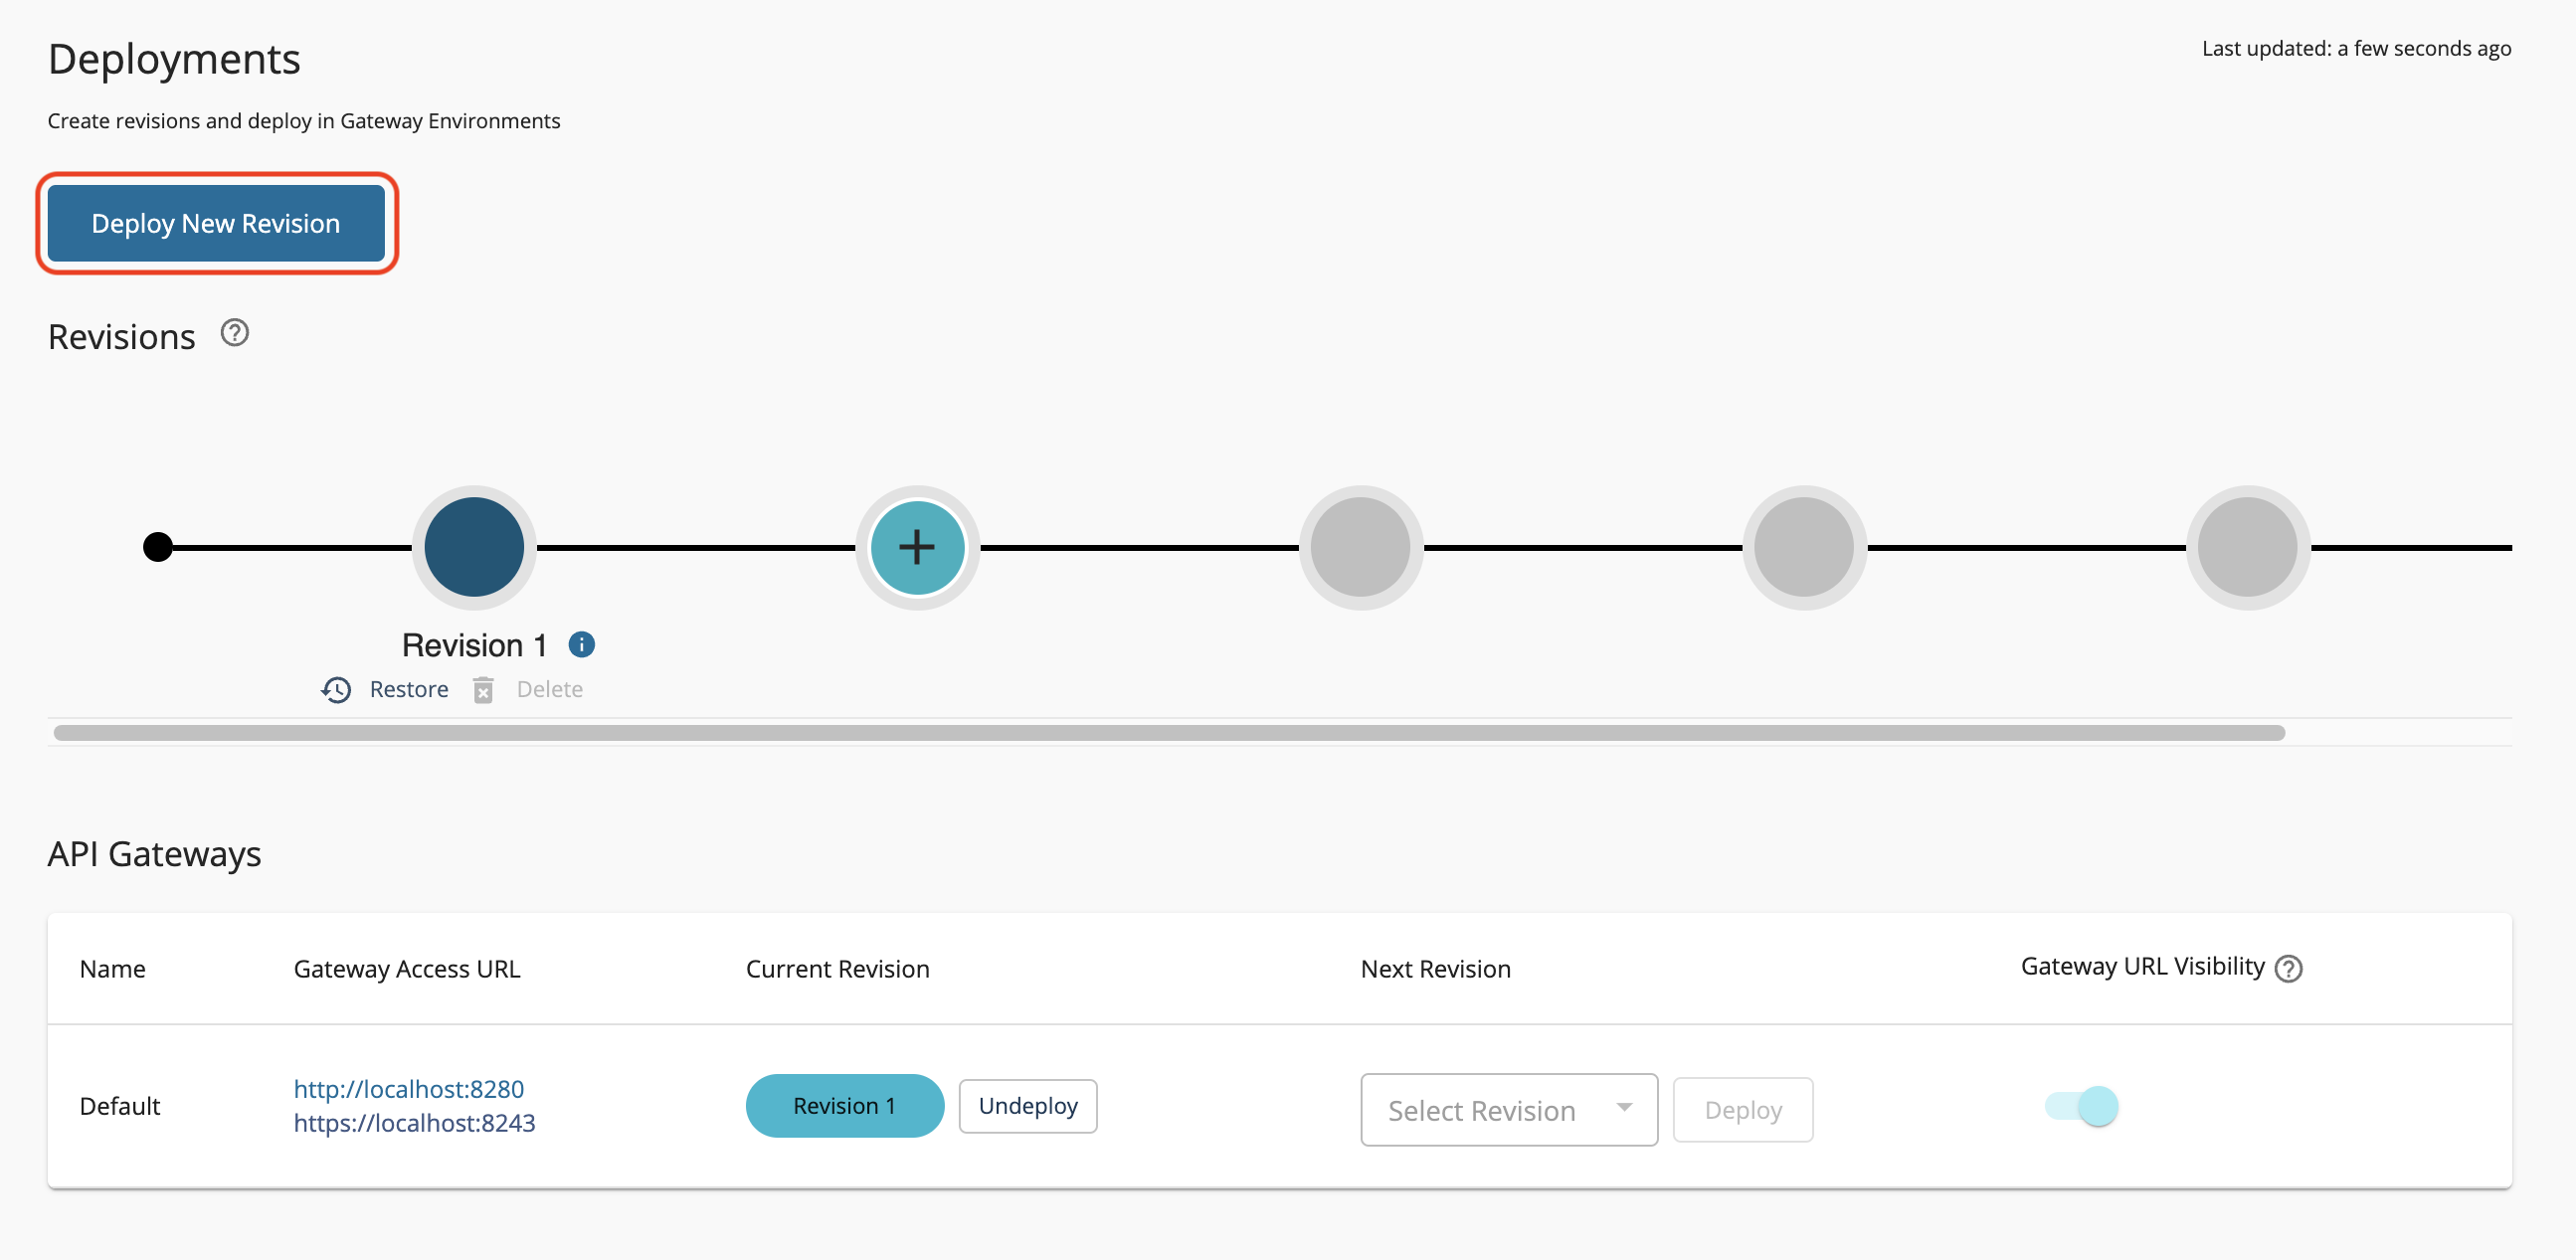
To deploy a new revision:
-
Click Deploy New Revision
-
Optionally, provide a description for the new revision
-
Select the Gateway environments for deployment
-
Click Deploy
-
Monitor deployment status for each Gateway
Your API or API Product is now deployed and ready to receive traffic through the Gateway!
Warning
You cannot deploy more than 5 revisions. If the maximum is reached, delete an existing revision first.
See Also
- Deploy an API - Step-by-step guide to deploy an API using revisions.
- Create API Revisions - Learn how to create and manage API revisions for deployment.
- Publish an API to Developer Portal - Make your deployed APIs discoverable and subscribable in the Developer Portal.
- Gateway Environments - Configure separate production and sandbox Gateway environments.
- Gateway Policies - Apply global policies across all APIs deployed on a Gateway.
- Understand Rate Limit Enforcement - Learn how the Gateway enforces rate limiting policies in real-time.